To send your mail piece you will need to import a list of recipients to our platform. There are multiple ways to achieve this such as using our API to feed data in but the most popular and simple approach is to upload a CSV or Excel file using the dashboard.
The correct format
Your data must be either a CSV file or an xlsx file. When using excel files you must not use multiple sheets or have the file password protected.
We recommend your recipient data to be in the following format.
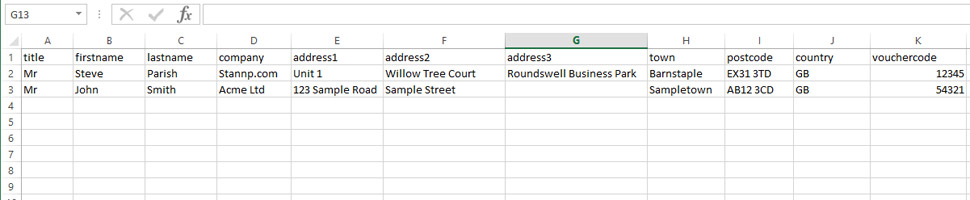
If you are unable to output your data in exactly this format then it shouldn’t matter as we can map it later. We just require the postcode to be in a separate column and row 1 to contain column headings.
You can include extra column headers, our platform will still import them, for example the data above has a “vouchercode” column which will later be imported as a custom column.
Uploading & mapping
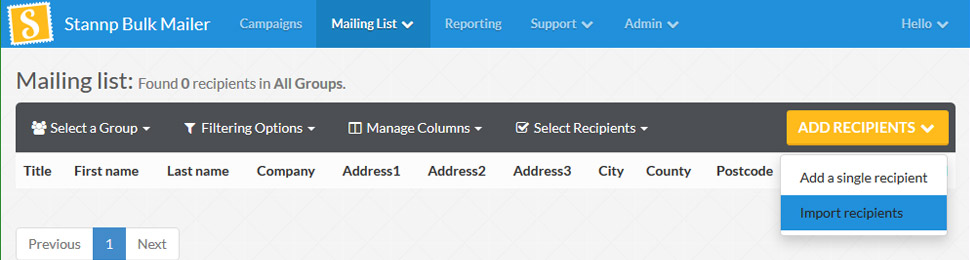
Now you have your data file ready you can log into the dashboard, navigate to your recipient list and press the button to import data.
You will be presented with a page asking you to upload your data file. Select your data file and click upload. If all go goes well you will then see the mapping page.
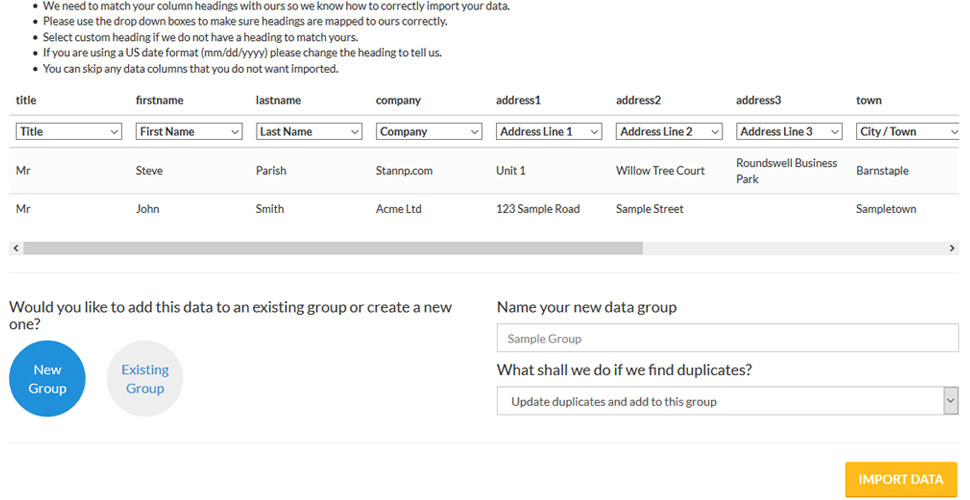
At the mapping page our platform will try to match your column headings with ours. If your data isn’t exactly like the recommended format you may need to manually map some headings.
Looking at the screen shot above you can the files column headings in bold and drop downs below. The drop downs are heading titles that we use.
It is important to map your headings with ours the best you can otherwise we will not be able to mail merge correctly, or addresses may not match the Royal Mail PAF file resulting in an extra charge.
If your data has columns which you want to import but our platform hasn’t got it in the mapping drop downs you can select “custom heading”.
If you data has columns you do not want imported then select “skip”.
Data Groups
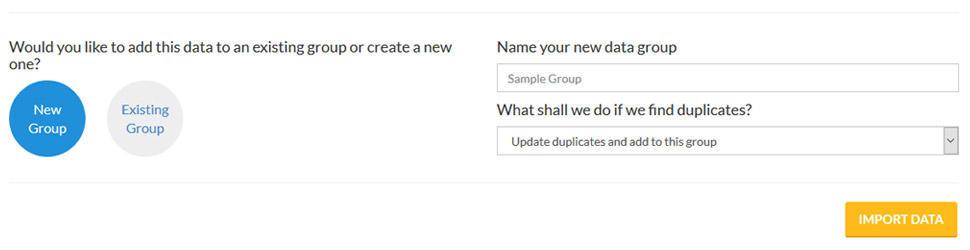
Once you are happy with the mapping you can choose to create a new group or import into an existing group. If you choose a new group be sure to give it a name.
Understanding how we handle duplicate records
Our platform will hold a global data list for your account. When data is imported into a group it will go into this global data pool. Then the recipients reference ID will be referenced to a group id. This means you can have single recipients in multiple groups etc.
During each data import our default setting is to look for duplicate addresses in the global data pool, if a match is found the latest import is considered newer data and as such it will update the recipients record with this newer data. An address is considered a match if the firstname,lastname,address1 and postcode all match. This is our default setting because it will prevent recipients receiving multiple mail pieces from the same campaign and also keeps the account data clean and tidy.
We understand this may not always be the desired results for some accounts. So when importing data there is an option to insert all duplicate addresses as new unique records. You can do this by selecting “Insert all duplicates and unique records” under the “What shall we do with duplicates?” option.
Data validation
If all your data or a very high portion of your data is invalid then chances are your mapping is incorrect. If this is the case you should go back and try importing again paying extra care when mapping. Make sure you tell us which column is address line 1 and which column is the postcode for us to correctly check.


