Step by Step guide
Stannp can be used with Zapier to automate sending your direct mail. For instance you can trigger sending direct mail when events happen within your Sales Force account. Events such as new leads, new opportunities, tasks and more can be used to trigger Stannp actions.
To use our Stannp Zapier integration, you have to go through the following steps:
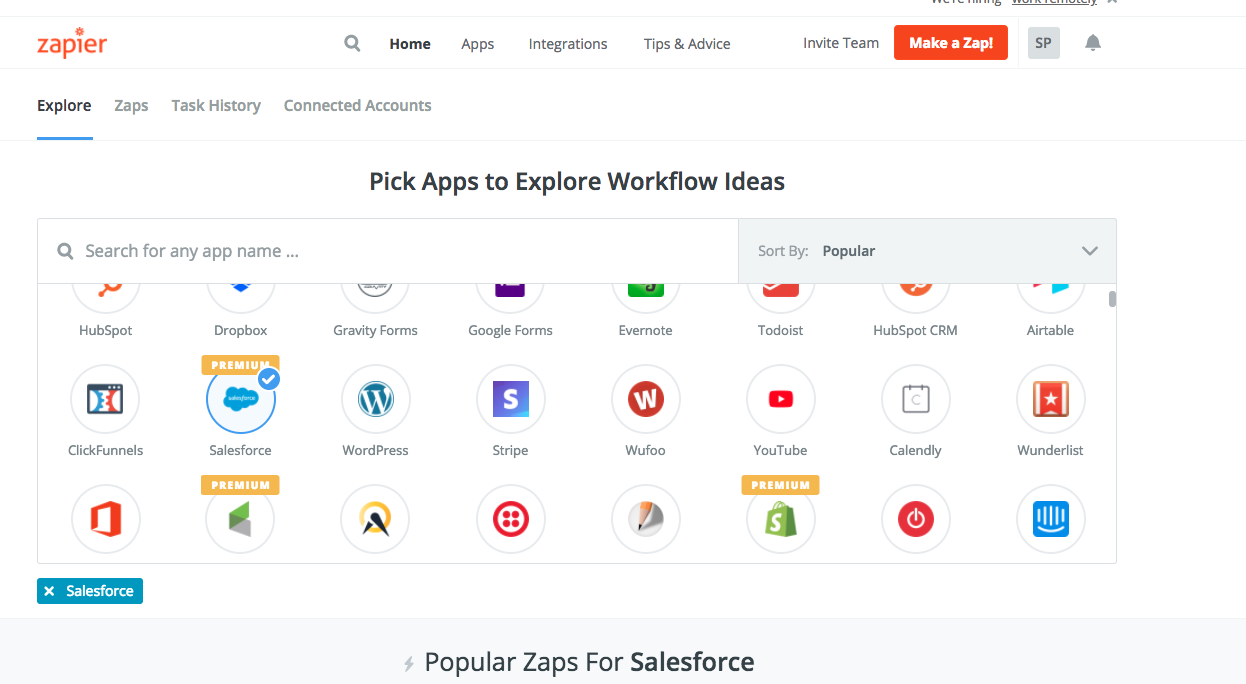
- On the dashboard, you can select Salesforce app and then the “Make a Zap!” button.
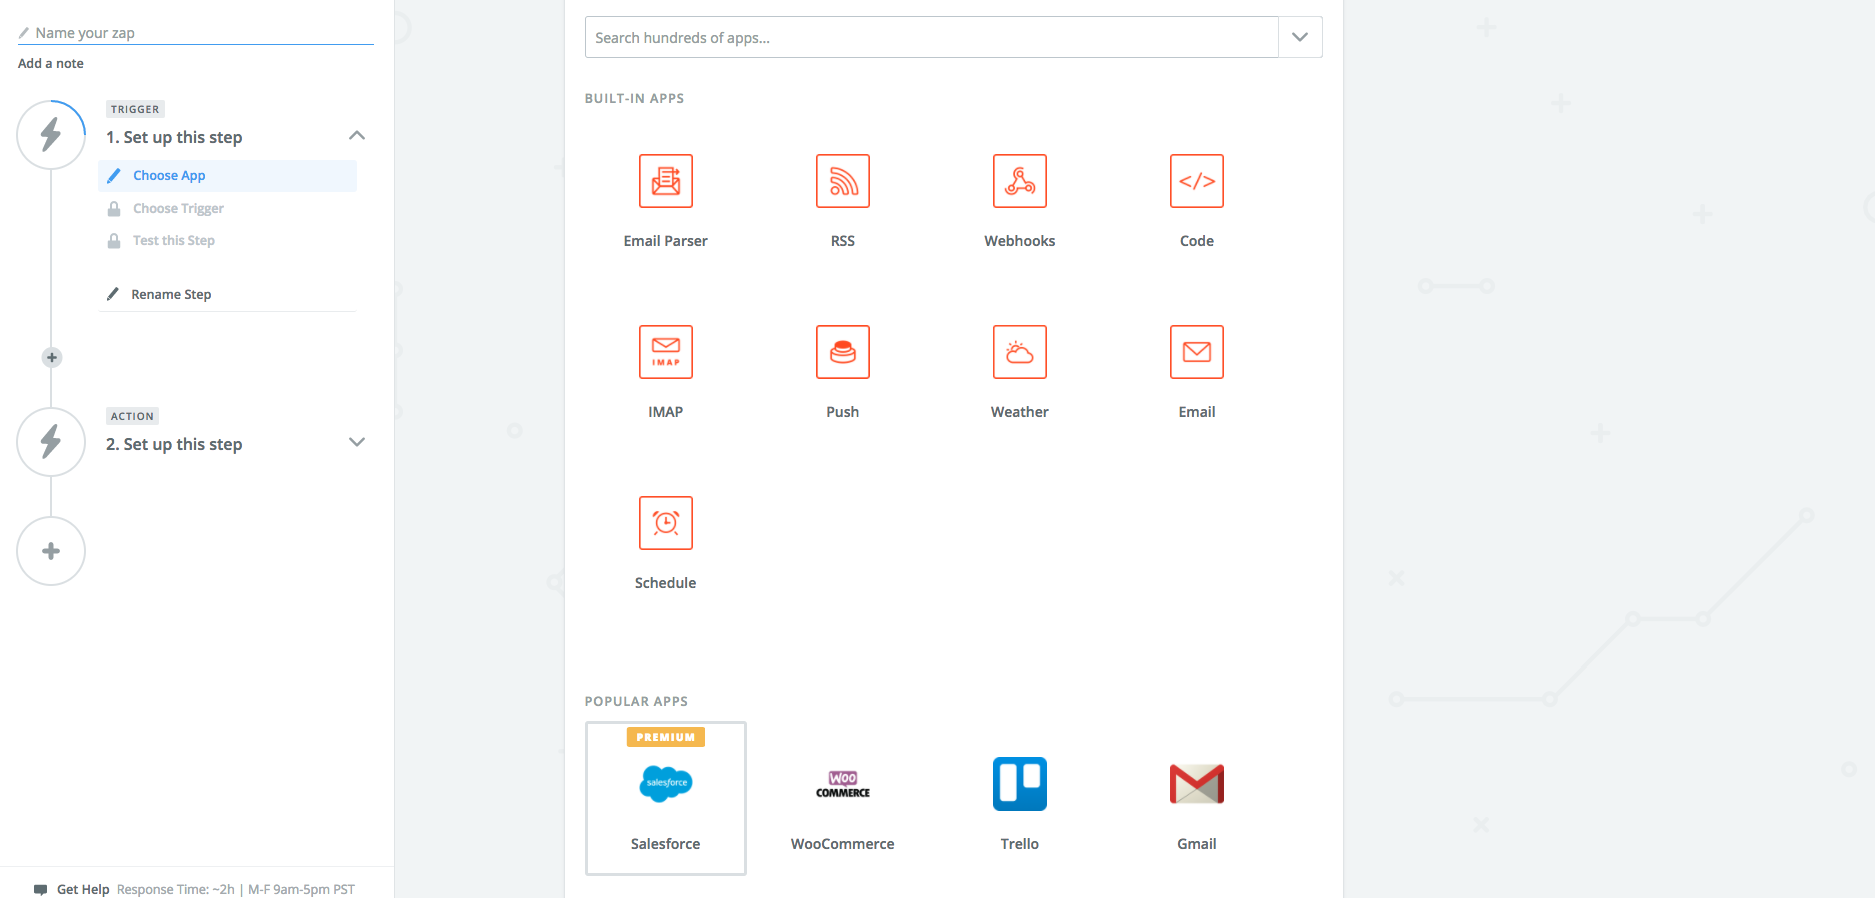
- Choose the Salesforce app in the “Choose App” step
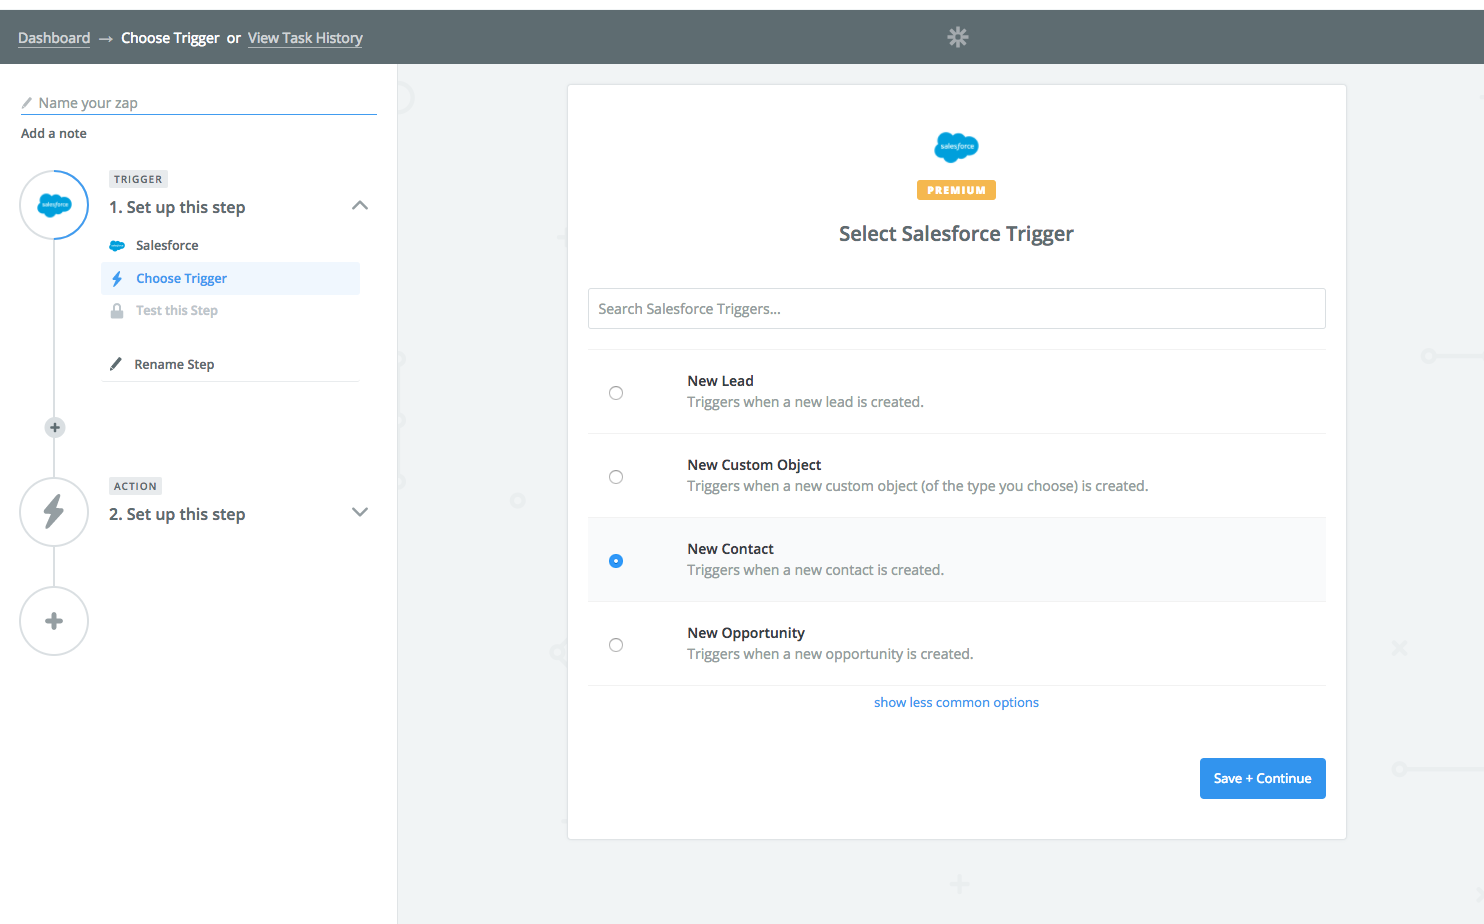
- Choose your trigger
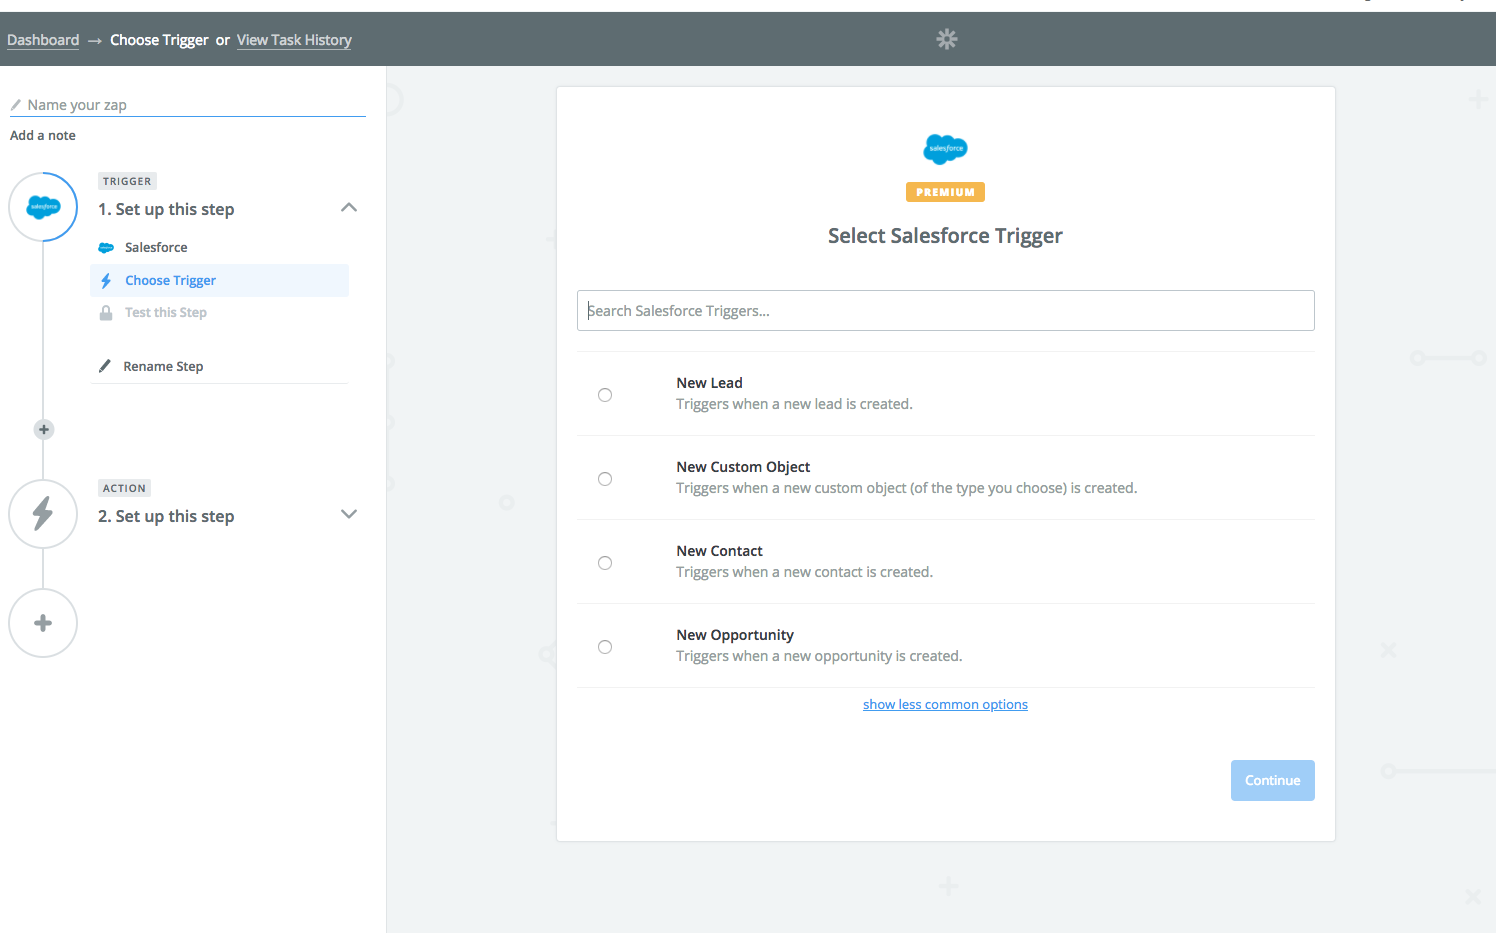
- You can expand the list by selecting “show less common options”
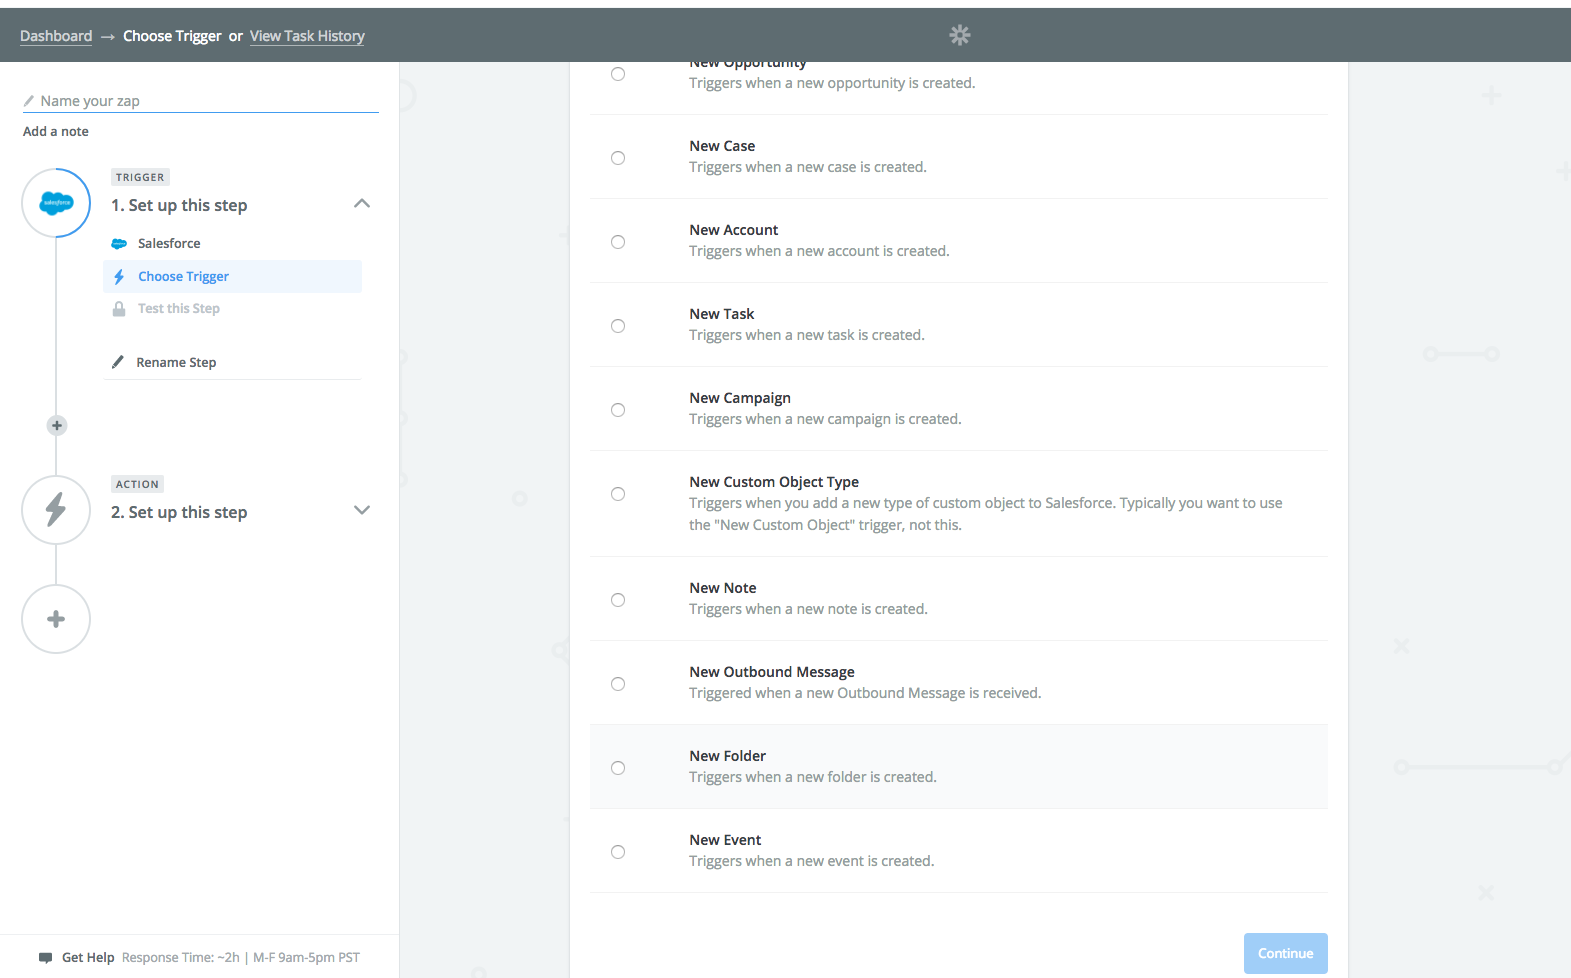
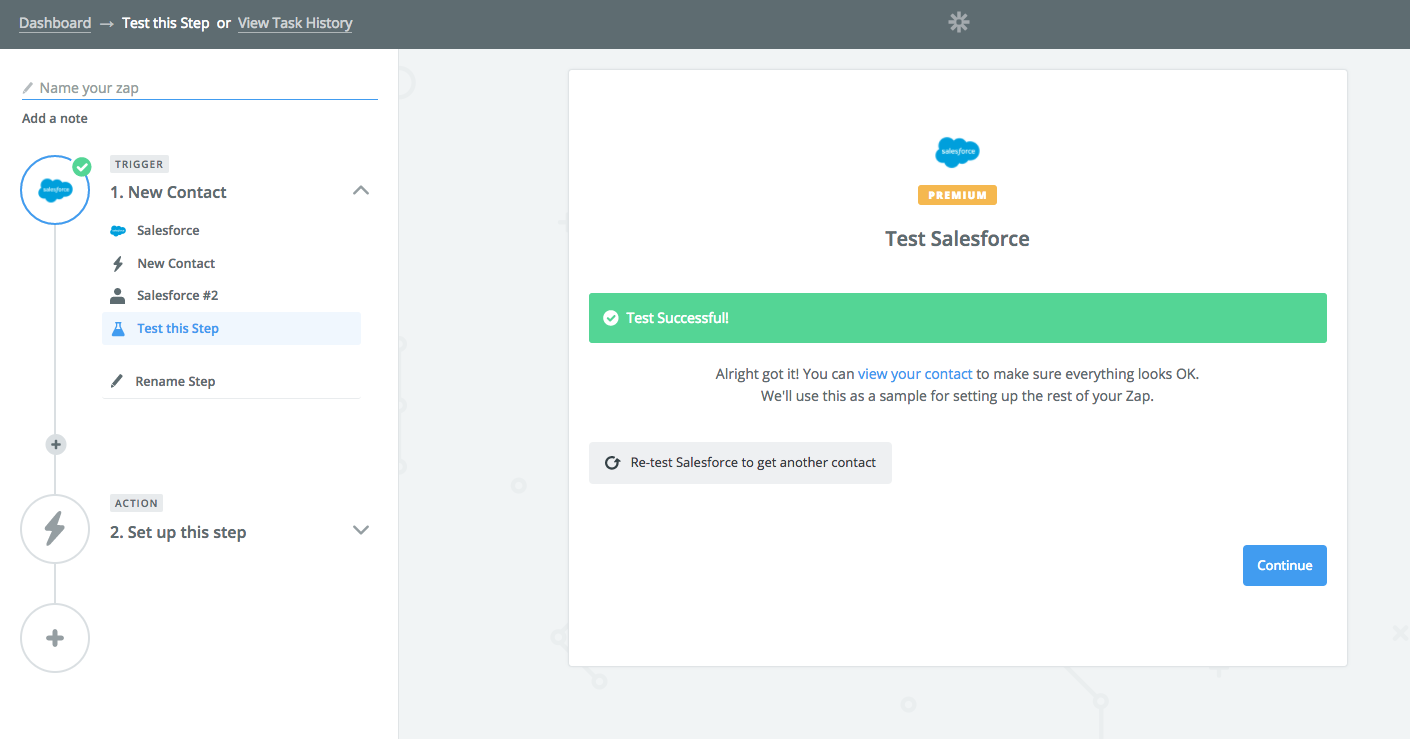
- For this example, I chose New Contact and selected Save + Continue
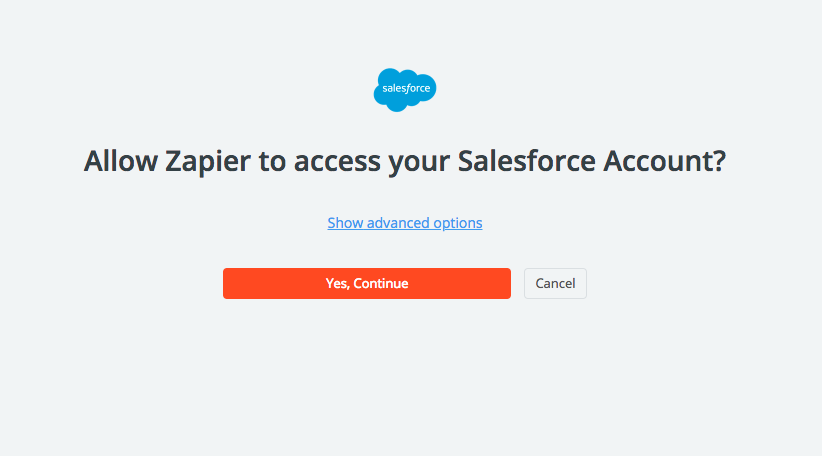
- I allowed Zapier to access my Salesforce Account
- Tested the account
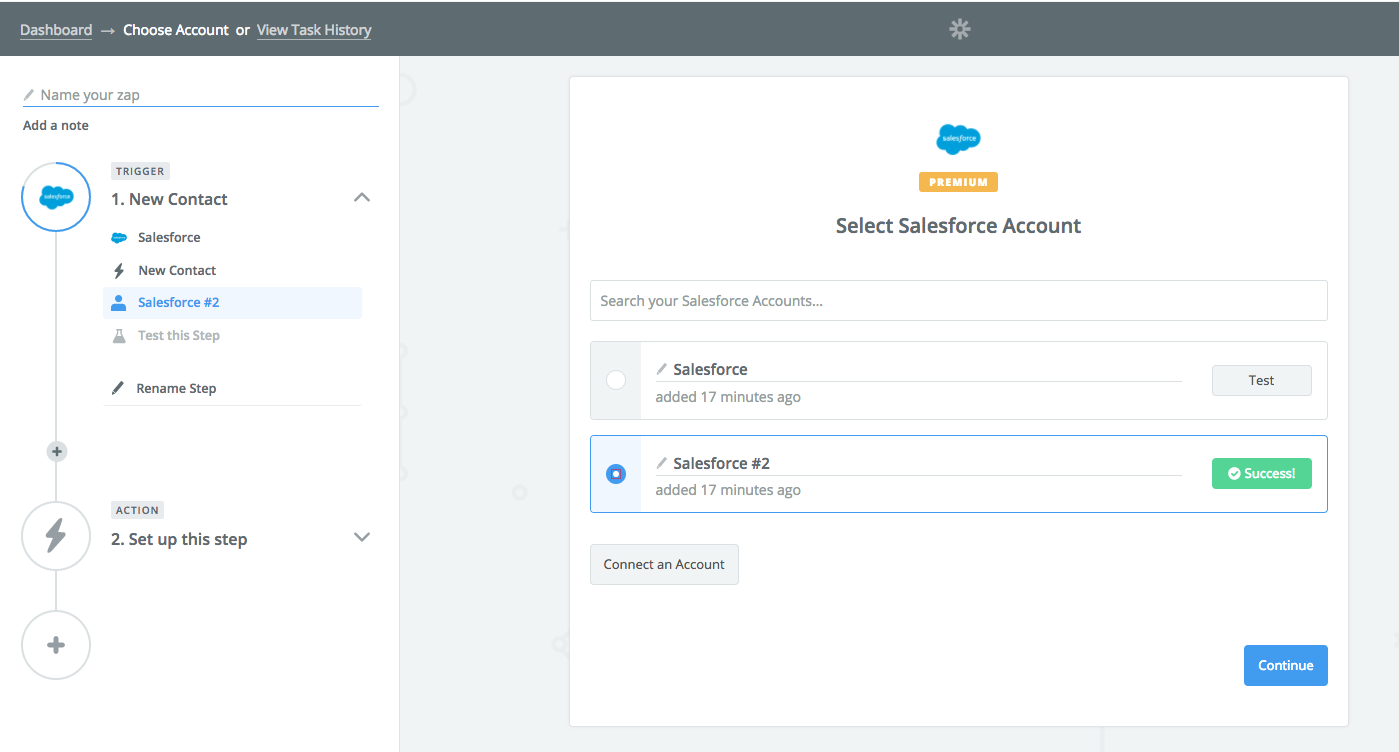
- Continued to the next step
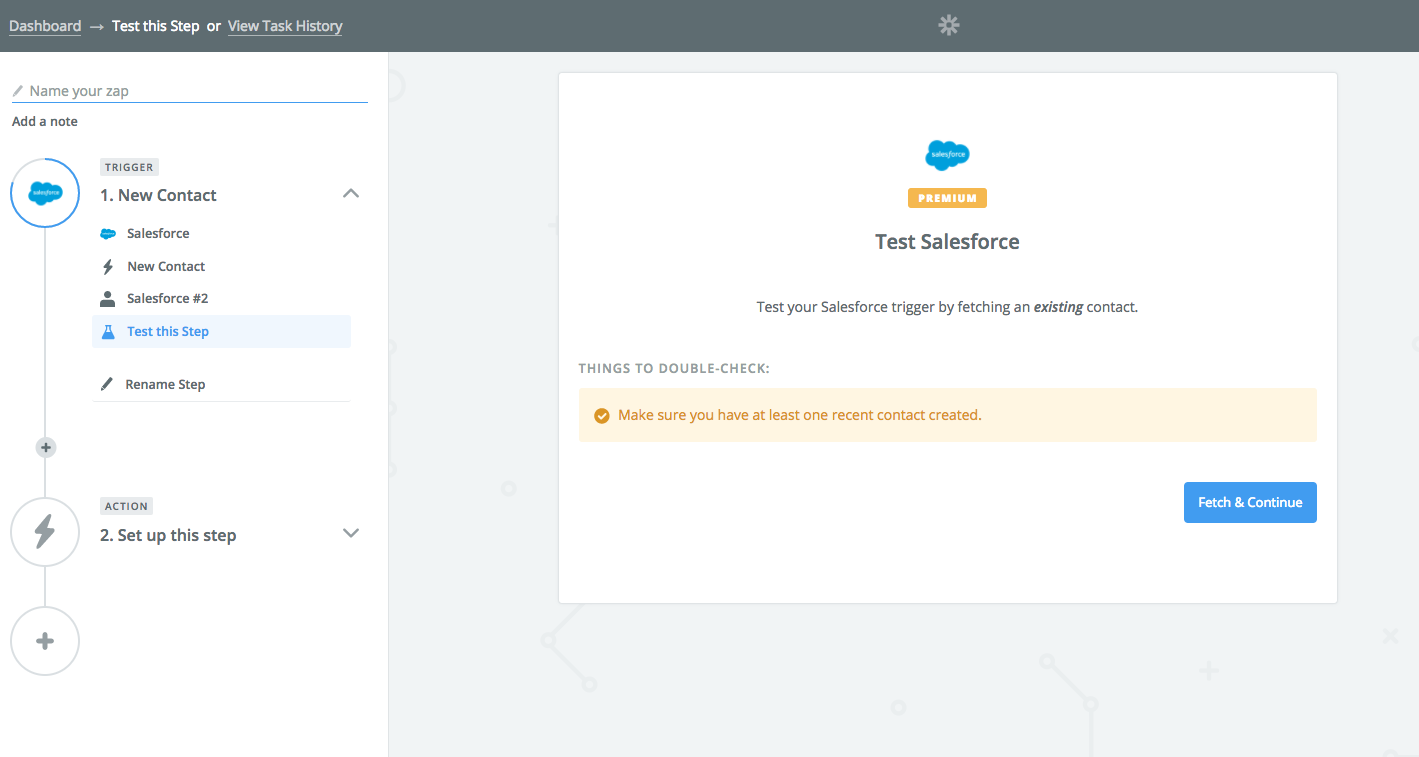
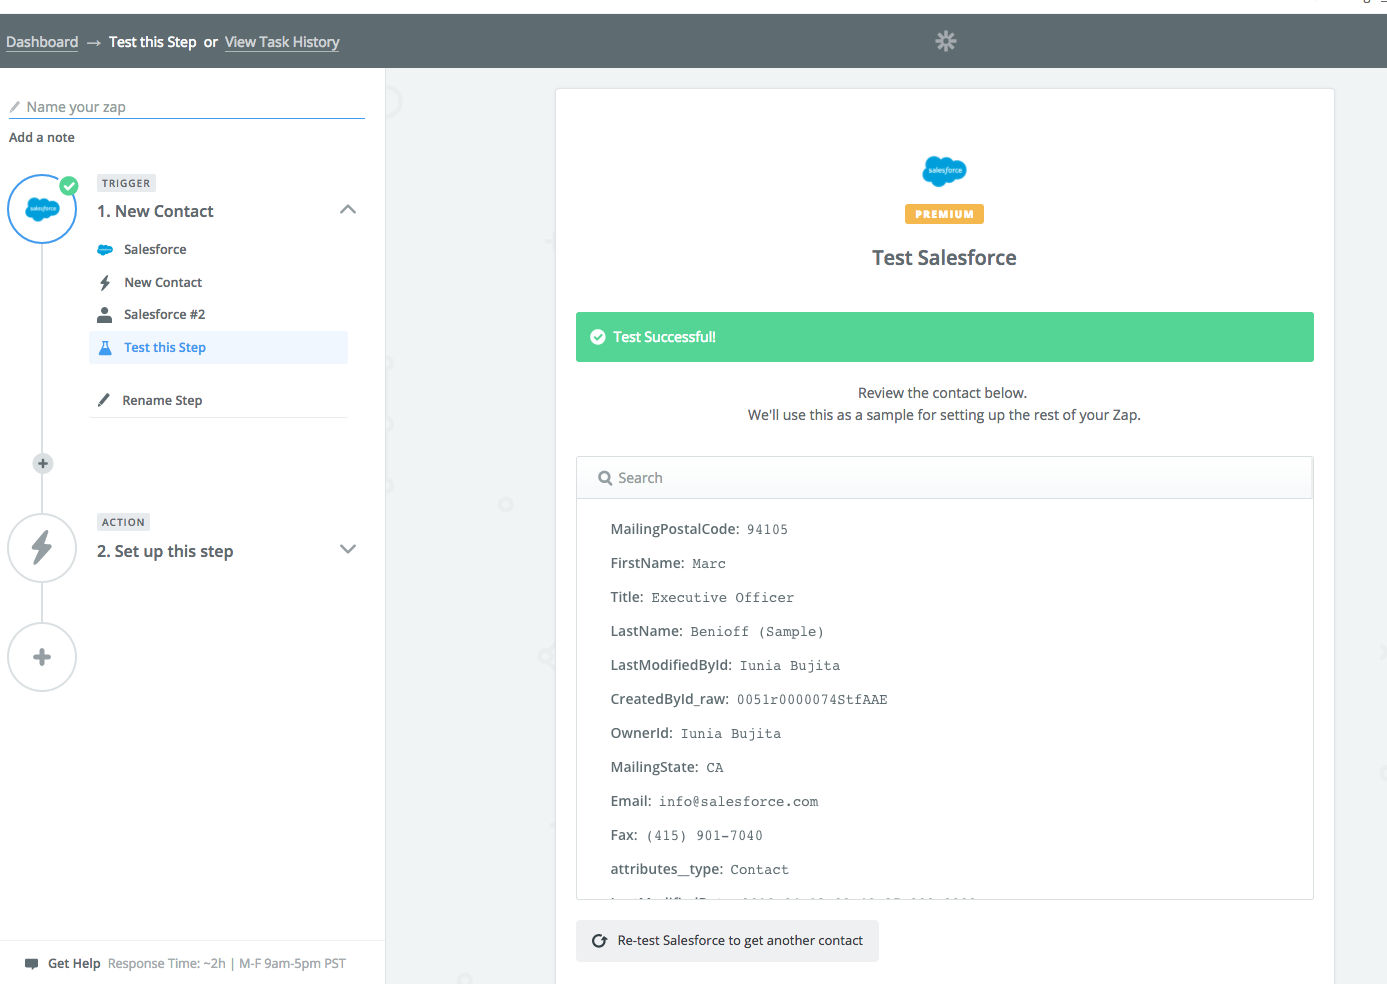
- Created a new Salesforce contact (in my Salesforce account) and fetched the data
- You can also view the data by selecting “view your contact”
- Now we select the Stannp action:
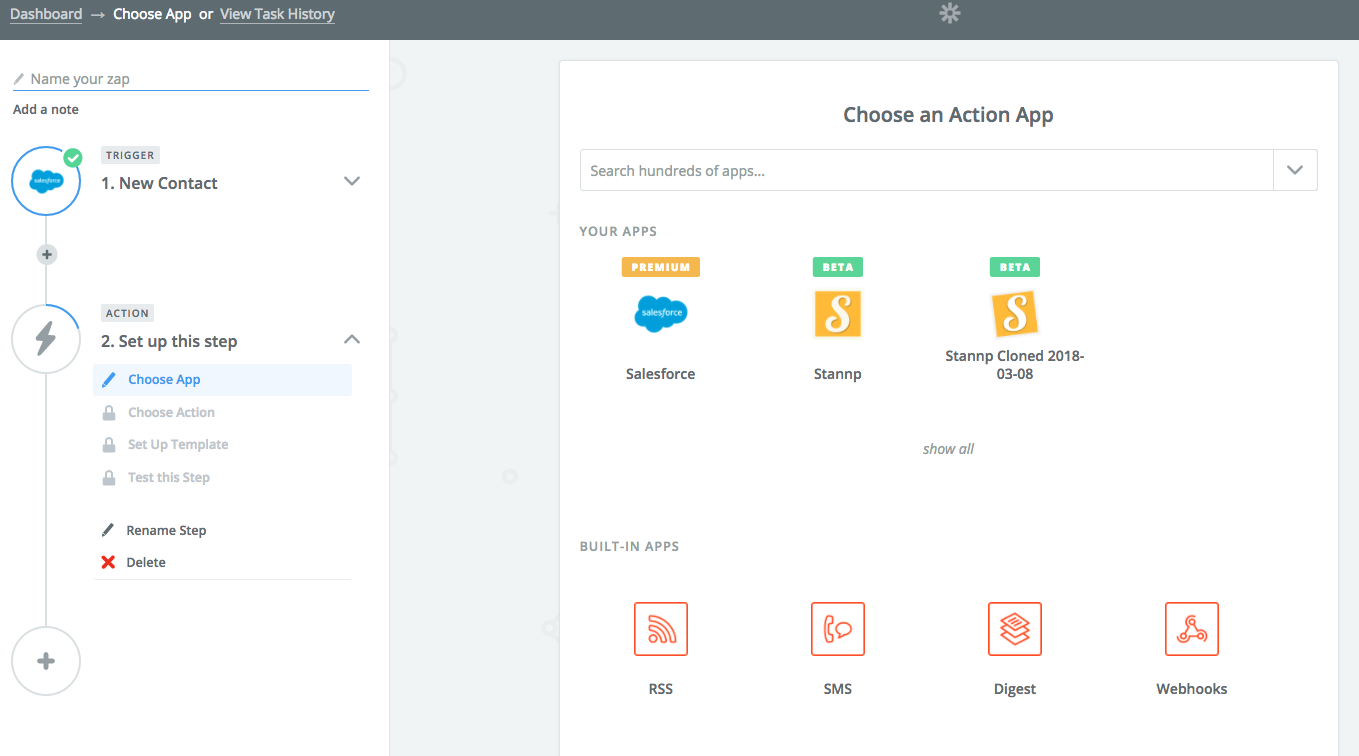
- For this example I will use the action “Add Recipient”

- Select an existing account or click on Create an Account and add your stannp api key (https://dash.stannp.com/my-key) and Continue

- Map your SalesForce fields:
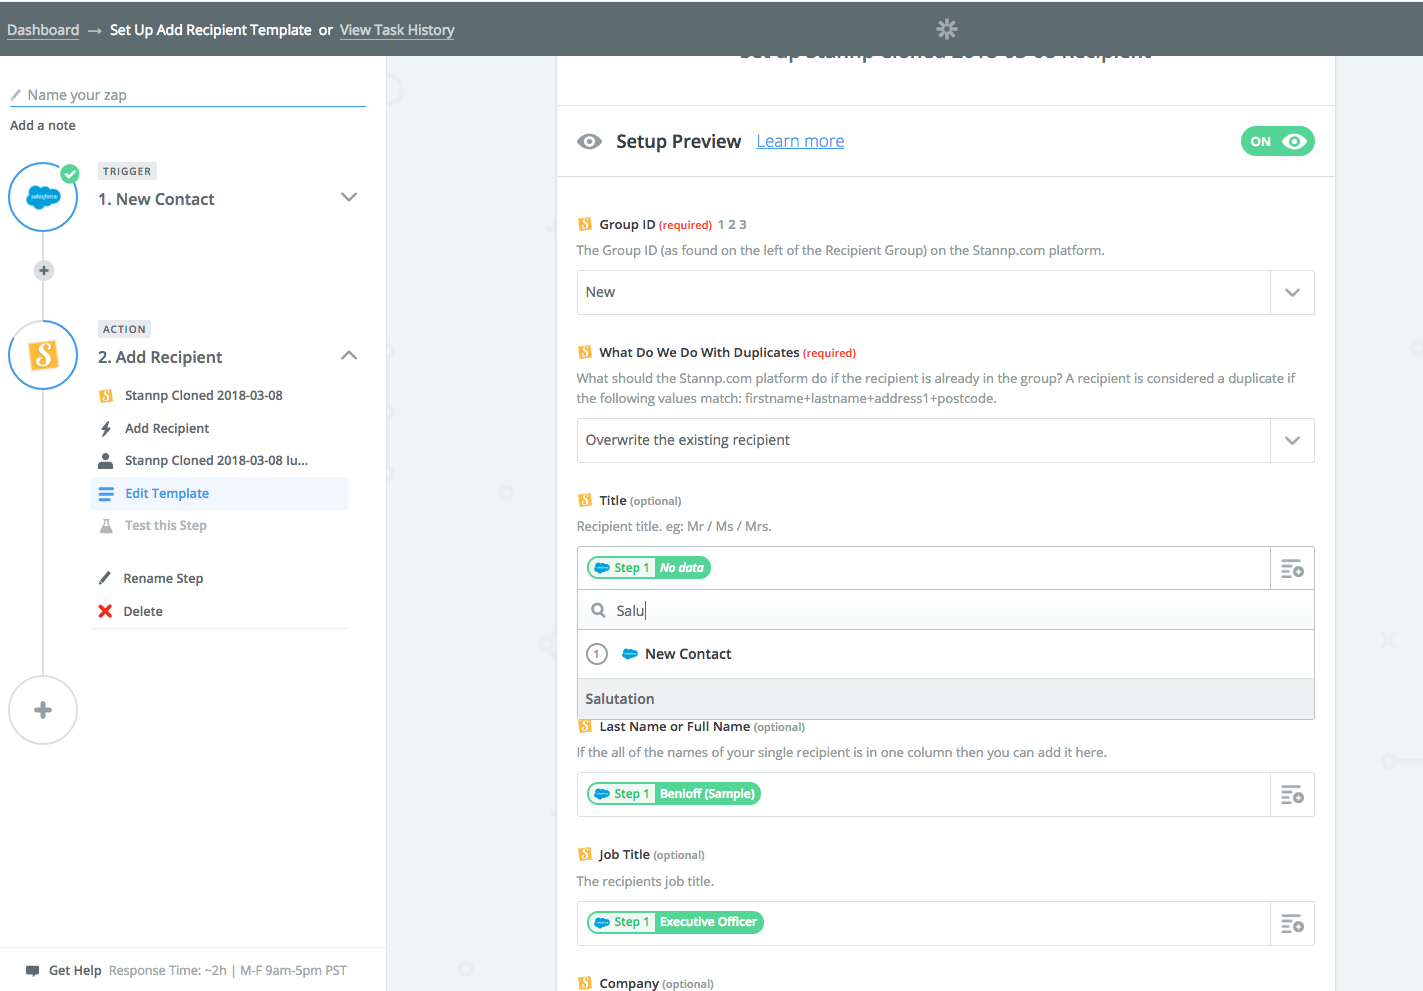
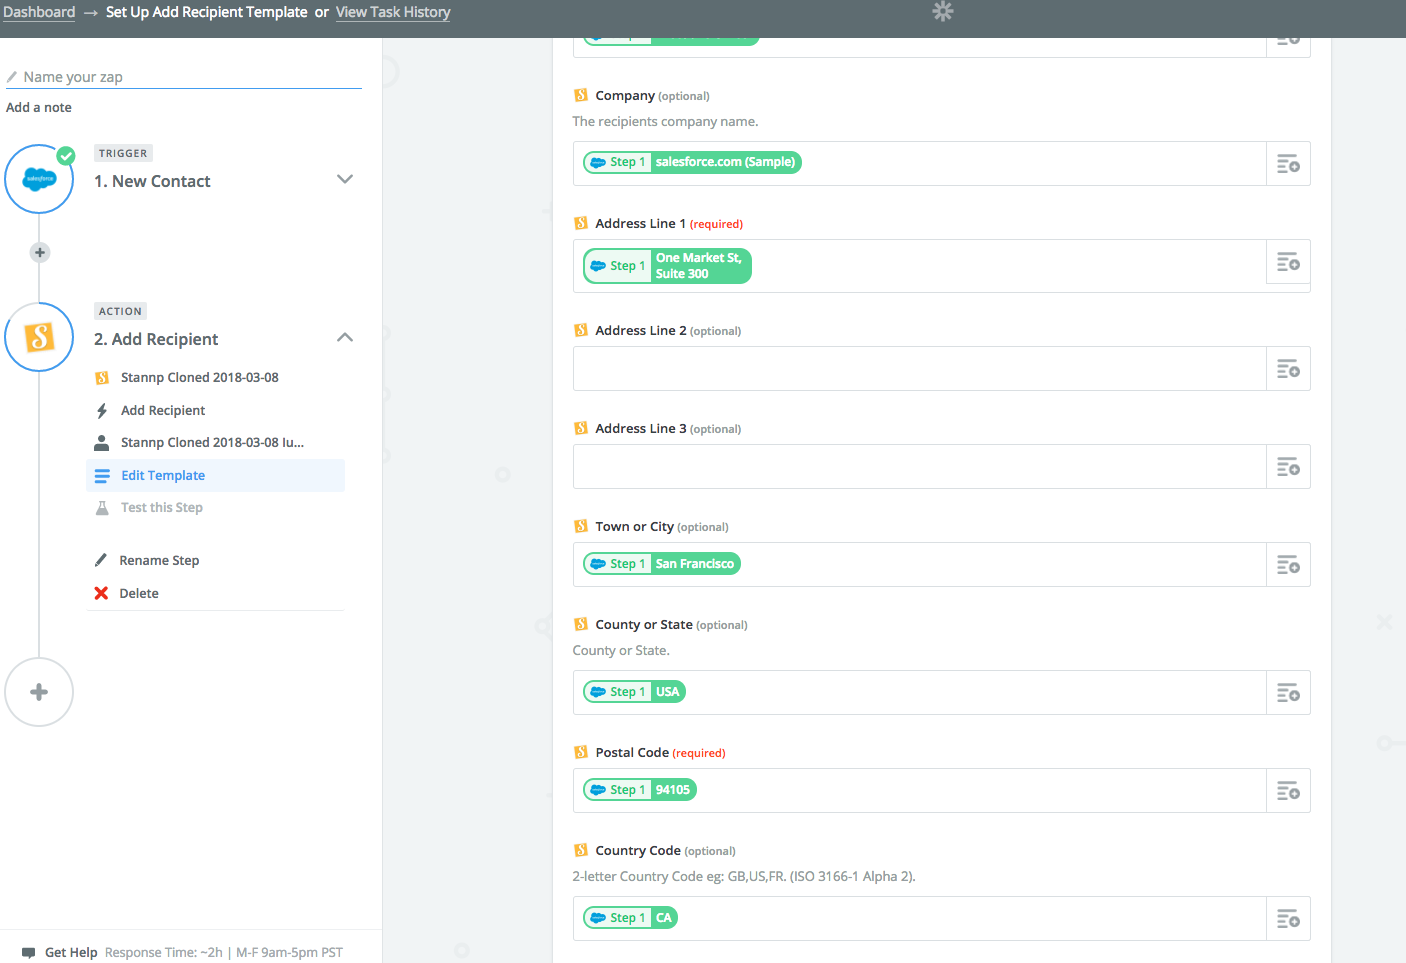 I’ve done:
- Salutation for Title
- Firstname for Firstname
- Lastname for Lastname
- Title for Job Title
- Account Name for Company
- Mailing Street for Address Line 1
- Mailing City for Town or City
- Mailing Country for Country Code
- Mailing State/Province for Country or State
- Mailing Postcode for Postal Code
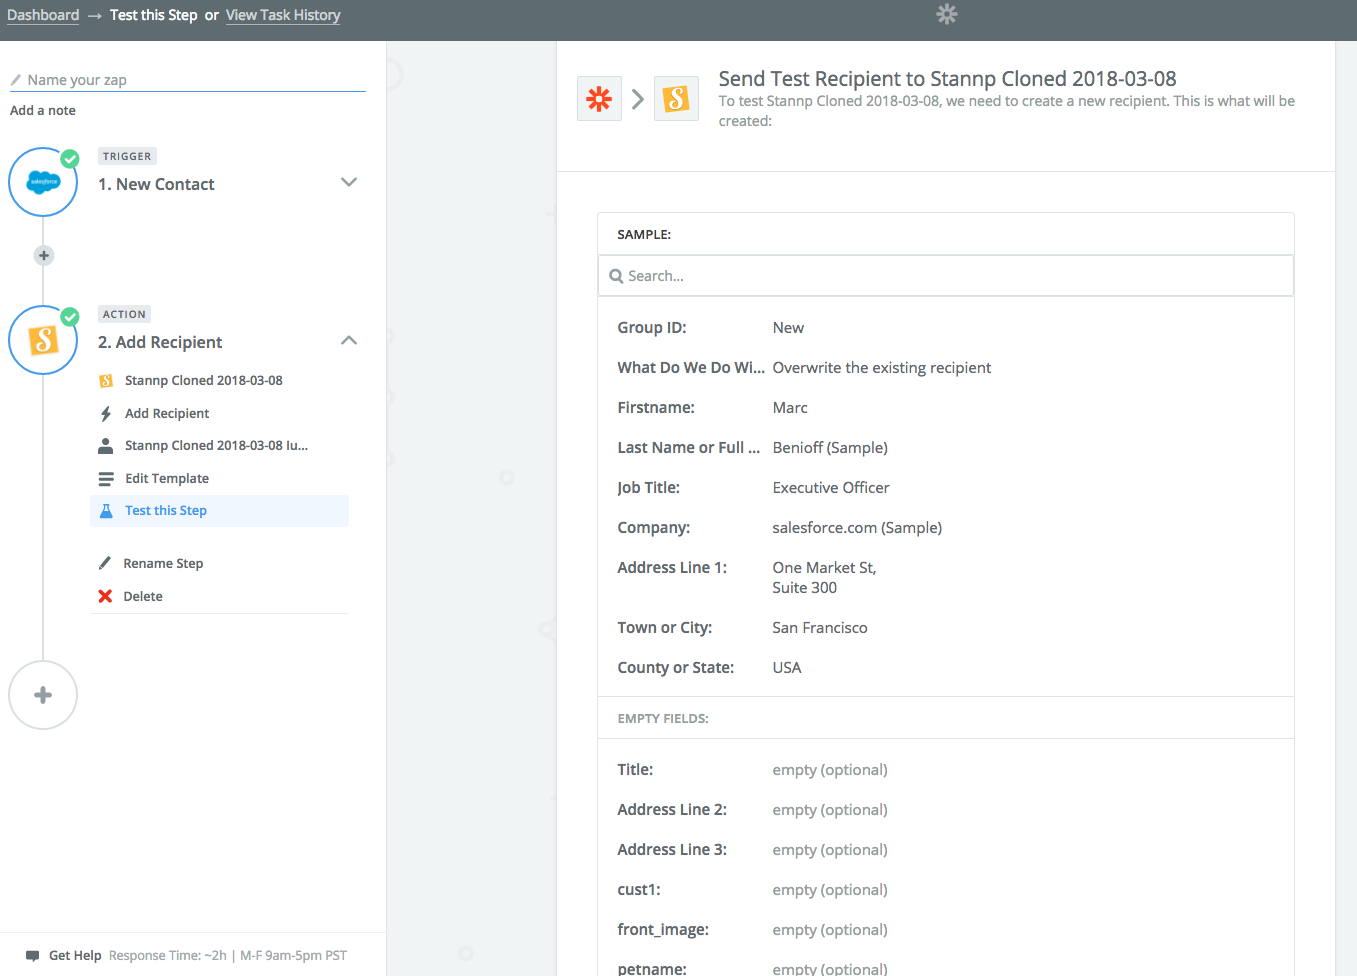
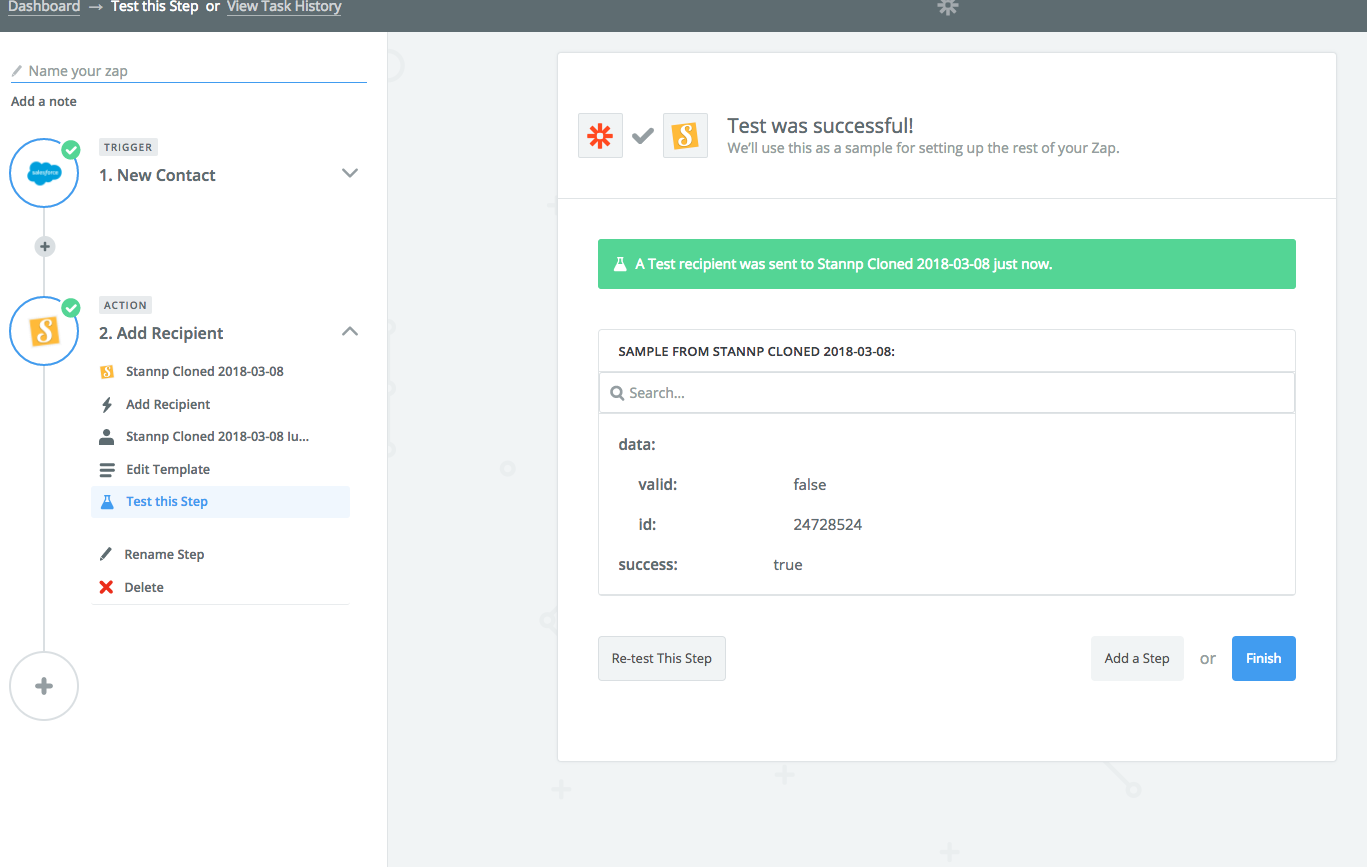
- Check your data
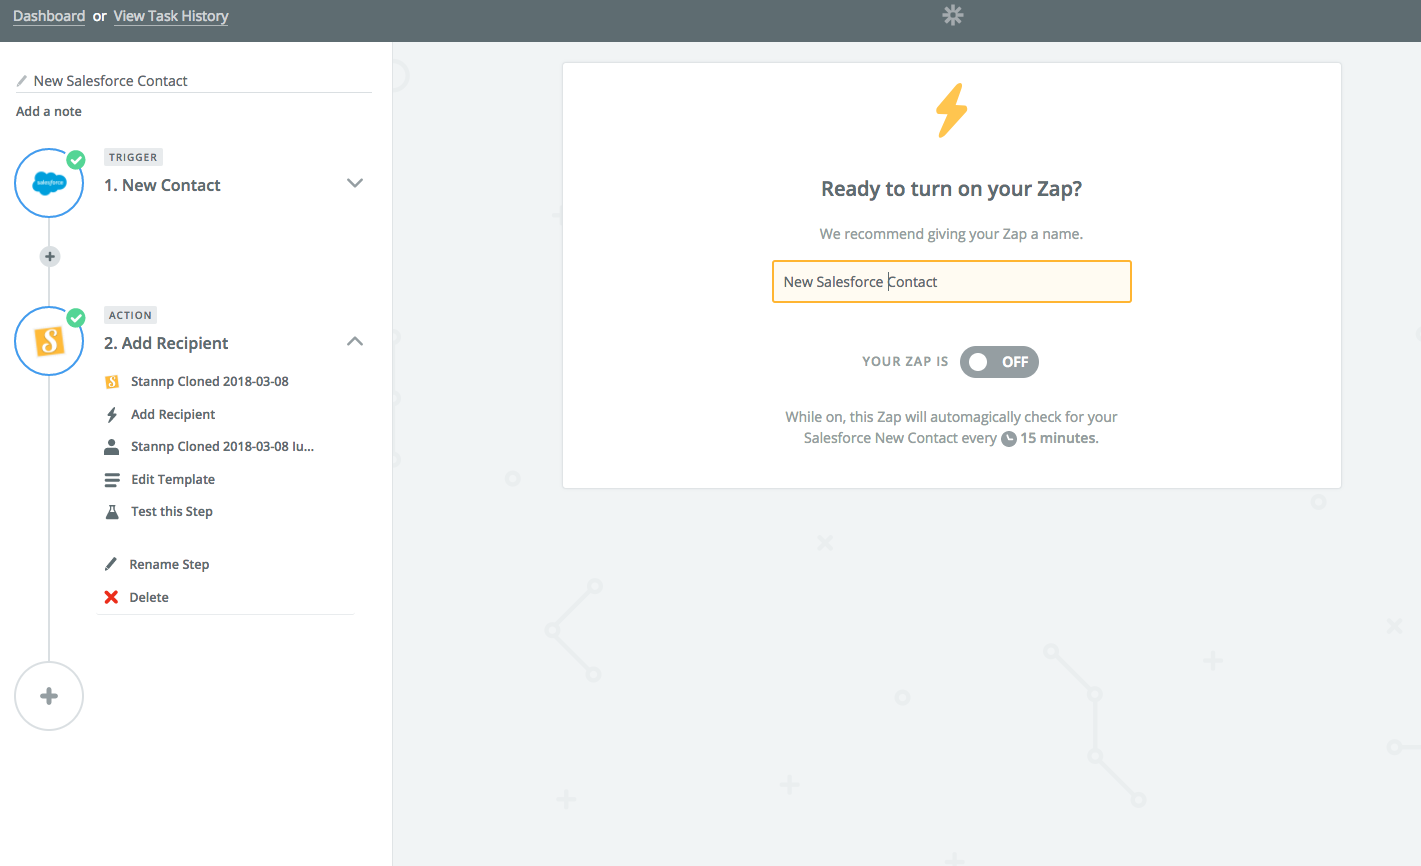
- Give a name to your Zapp and turn your Zapp on (optional):
- Check your Stannp Account:

Thank you!


