We love bringing you new features and upgrading our service.
Because our tech. team develop in an agile fashion and our service is Cloud hosted on load balanced servers, we can launch new features and updates without any of that annoying service downtime.
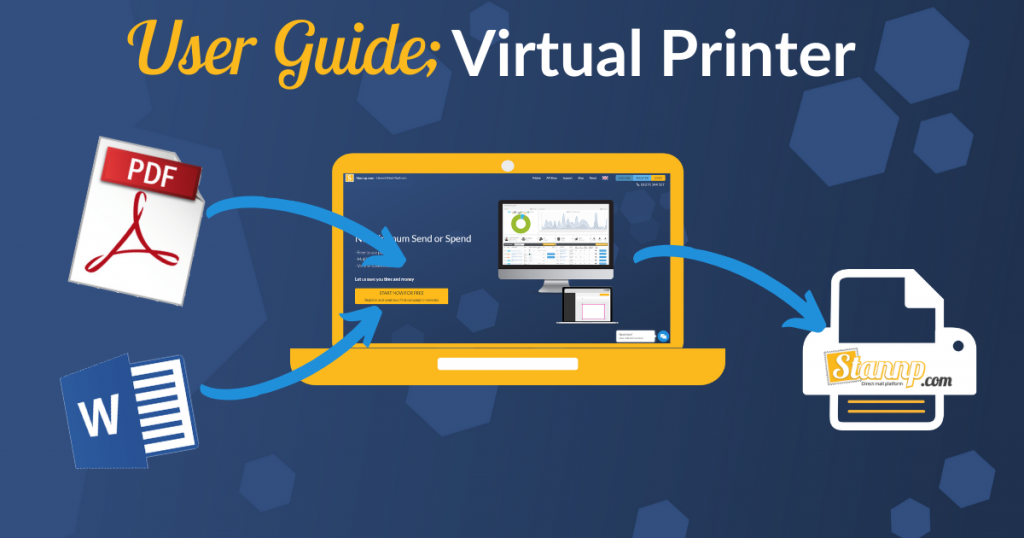
Our newest feature is an upgrade to our recently launched Virtual Printer service; adding in some fantastic Optical Character Recognition (OCR) capabilities, to help save you money by PAF matching your pre-merged letters!
How To Use The Stannp Virtual Printer
When you go to the Virtual Printer page (accessed from the “Send Mail” menu on the header of any page on your Stannp account) you will see the Virtual Printer Menu;
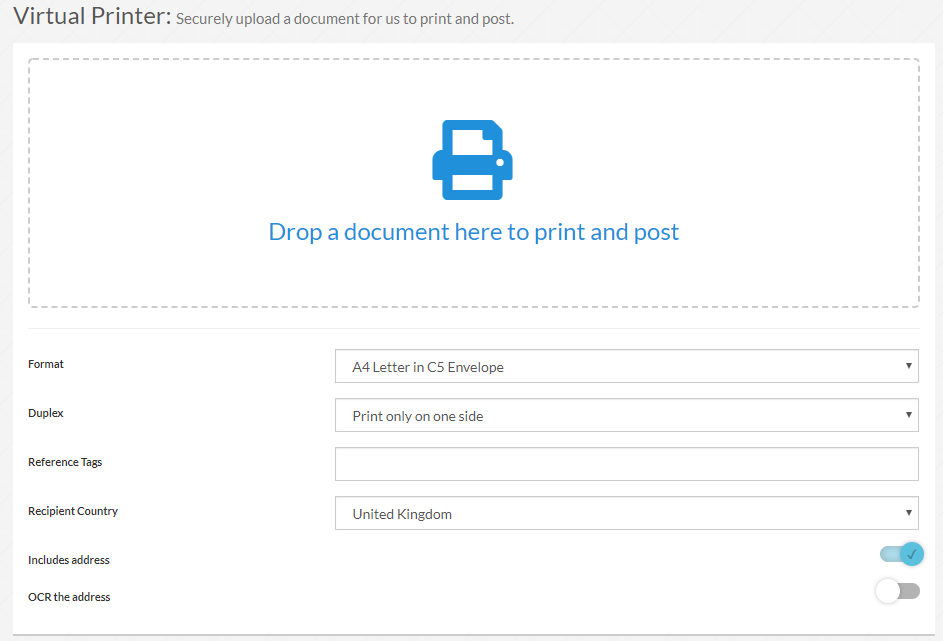
Format – There are currently 3 formats available on the virtual printer;
- A4 Letter in a C5 Envelope
- A4 Letter in a C5 Envelope – posted first class
- A4 Large Letter in C4 Envelope
Duplex – Use this to choose whether your letter is going to be printed single or double sided.
Reference Tags – This section allows you to add tags to you file (that won’t appear on the printed version) to help you find the file again later. These are for your use and can be anything that suits you, but might include things like a campaign name, type, geographical area etc, for example “July Sales Letter Sheffield”.
Recipient Country – Stannp offers you a worldwide postal service; in order to provide you with the best possible price and delivery please choose the country this letter is going to.
Includes Address -This option is ticked by default as the majority of customers using this service are uploading pre-merged letters with addresses already included.
If you un-tick this option the system will present you with 7 additional fields to allow you to add the details;
- Recipient Name
- Recipient Company
- 1st line of address
- 2nd line of address
- Town / City
- County / State
- Postal code / Zipcode
OCR the address – ticking this option tells the system to run our new OCR service on your file to PAF Match the address.
Document Upload – When you’ve selected all the options you need, drag and drop your document onto the big blue printer icon at the top. This will activate the Print Preview window on the right of the page.
Print Preview
Once you upload your file the print preview window on the right hand page will show you a preview of how the letter will look when printed.

If you haven’t chosen the ‘OCR the address’ option, below the print preview window you will also see an Envelope preview.
The Envelope preview shows how the address in your uploaded document will appear in the window of the envelope; this allows you to check that the address is positioned correctly in your document to be visible when enveloped.
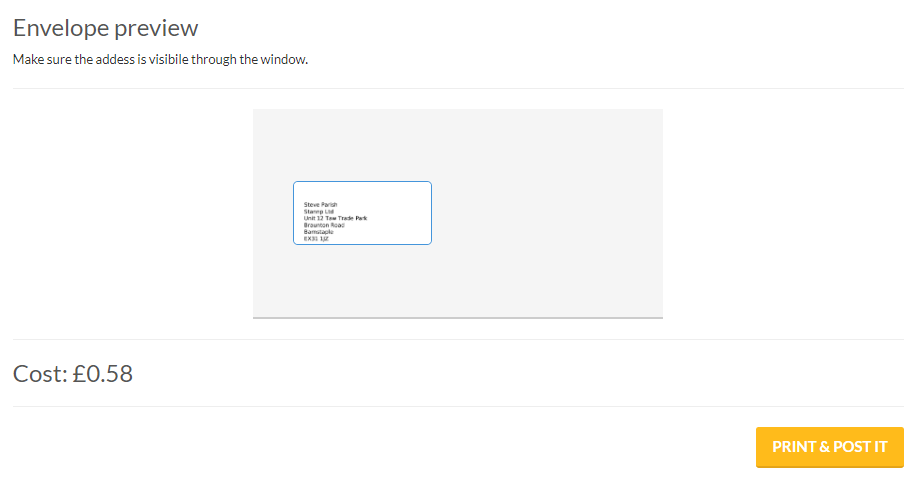
Below the envelope preview you will see the total cost for printing and posting the file you have uploaded. (Our sample file here is just a single page letter without PAF match, which will cost 58p to print and post).
Optical Character Recognition (OCR)
If you select the ‘OCR the address’ option the Print Preview window changes;
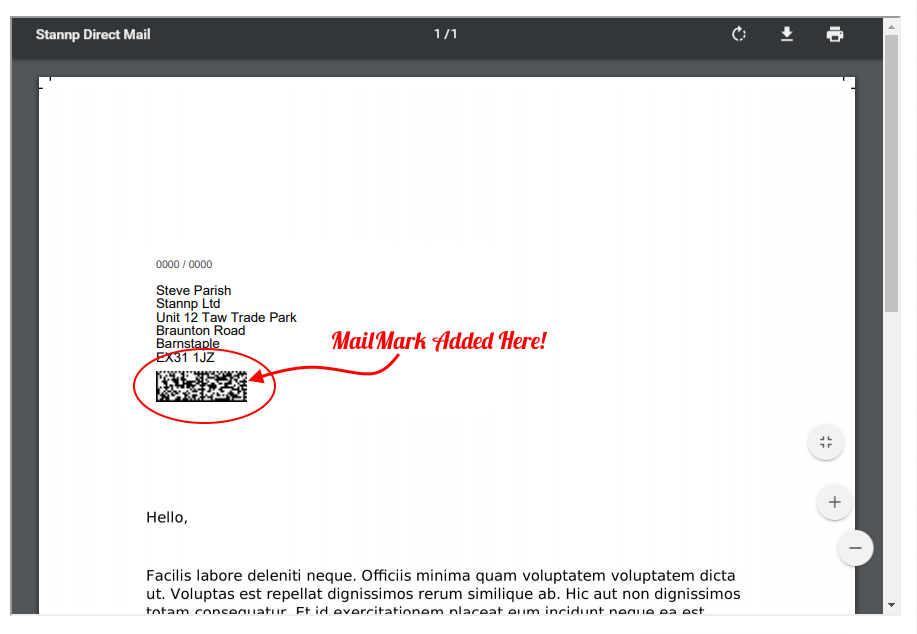
You will probably notice that the Stannp platform has added the Mailmark® barcode below the recipient address. This means the address has PAF matched; the barcode has been added to allow the letter to be machine sorted.
You will also notice that there is no longer an Envelope preview for this letter (as it is no longer necessary), and the total cost for printing and posting has reduced by 10p. The letter is now PAF matched and will not need to be hand sorted in the Royal Mail system.
If for some reason the OCR system can’t PAF match the address on your letter, the price won’t change, and the print preview window won’t include a Mailmark® barcode.
All you need to do now is click the yellow Print & Post It button and we will do the rest!
We hope you’ve found this guide useful. Don’t forget, for more useful hints tips and info find us on Twitter, Facebook and LinkedIn, and speak to your account manager.


