
Stannp have launched a brilliant new value added feature for all of our customers, called Postcode Radius Search (PRS). Not only is PRS fantastically useful for reaching new customers, Stannp are providing this service to you completely free of charge!
In short, you choose a postcode, choose a distance from that postcode, and Stannp’s Postcode Radius Search will create a a recipient group containing all addresses within a radius of your chosen distance around that postcode.
Not yet a Stannp customer? simply register for a FREE account and you can get started straight away. Once you’ve registered our friendly customer service team will get in touch to help you find your way around the Stannp platform.
Alternatively if you would like to have a chat with our team before you sign up, you can call us on 01271-344507 or via the ‘web-chat’ on this website.
What is Postcode Radius Search for?
There are all sorts of businesses that will find this new service useful, the only limit is your imagination!
Perhaps you are an estate agent and have just sold a house on a specific street, and would like to encourage other local residents to sell their house with you too? Postcode Radius Search can help you with that.
Maybe you are a local business that would like to send a special offer to all residents within 5 miles of your premises? Postcode Radius Search can help you with that.
Or perhaps you are a car dealer group with 97 dealerships across the UK, and would like to contact all businesses within 15 miles of each site to alert them to your new fleet car leasing deals? Postcode Radius Search can help you with that.
How to Access Postcode Radius Search
At the moment there are three ways you can access our PRS service.
1) From The ‘Select Data’ Screen
If you are in the process of creating a campaign and want to send your creative to a radius search group, you can create a Postcode Radius Search from the ‘Select Data’ screen.
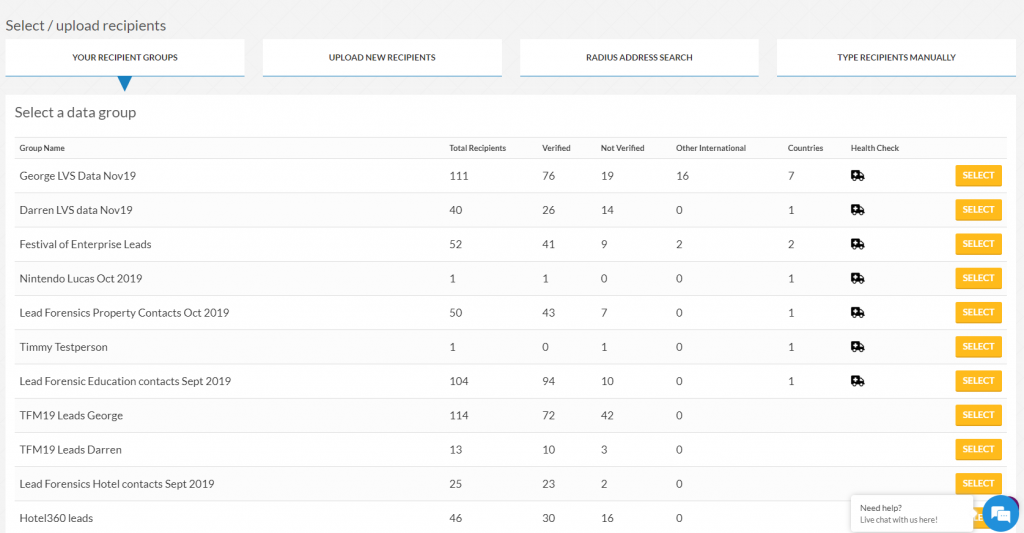
We’ve made the select data screen easier to use, with 4 new buttons along the top allowing you to see your recipient groups, upload new recipients, run a postcode radius search, or upload recipients manually.
To access the PRS select the second button from the right;

2) From Your Dashboard
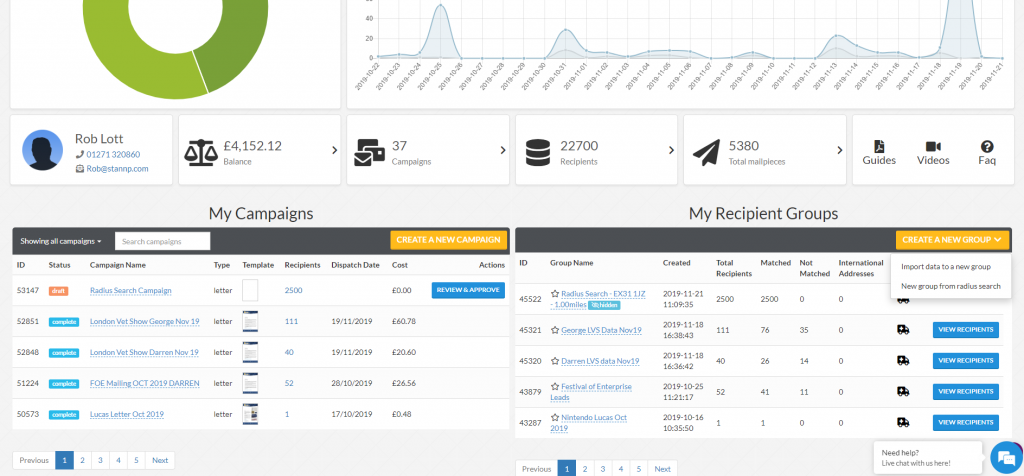
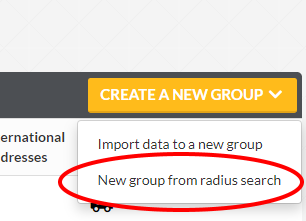
You can also access PRS from your account dashboard. Under ‘My Recipient Groups’ on the right hand side of the screen, the ‘Create a New Group’ button now includes the option ‘New Group From Radius Search’;
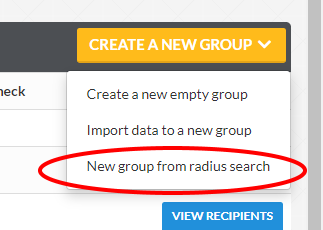
3) From The Recipient Groups Screen

The third place you can currently access PRS is from your Recipient Groups page. The ‘Create a New Group’ button on the top right now includes the option of ‘New Group From Radius Search’;
How to Use Postcode Radius Search
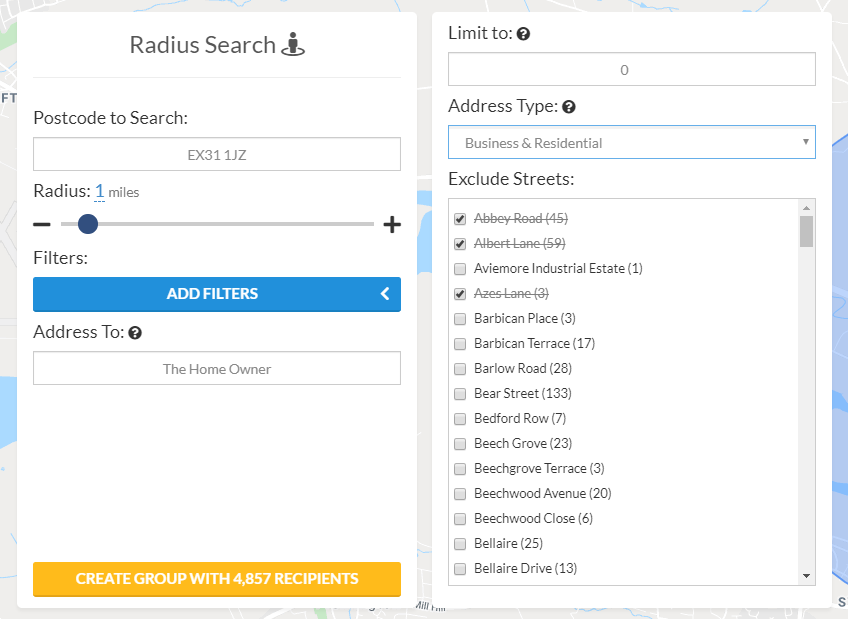
Whichever route you’ve taken above, you will be presented with our Postcode Radius Search screen, showing a map of the UK. PRS is currently only available for UK addresses (at the time of writing, November 2019).
Enter your chosen postcode into the ‘Postcode to Search’ box and the map will move to your chosen postcode, and overlay a circle onto the map showing the search radius you have chosen.

You can change the radius of the search in 0.1 mile increments and select any radius from 0.1 miles to 15 miles around the postcode you have selected. You can do this by either;
- Clicking on the blue number and entering a new value,
- Clicking the plus or minus icons to increase or decrease by a 0.1 mile increment, or
- Sliding the slider, left to decrease radius and right to increase radius
The yellow button will also update to show you the number of recipients that will be in the group you are creating.

Above the yellow button there is a box called ‘Address To’, which indicates who the mail piece will be addressed to in this group you are creating.
By default our system will use ‘The Occupier’. You can change this to anything else you would like by simply typing your text into the box.

When you are happy with your selection, click the yellow button and the group will be created.
Please note; the maximum Postcode Radius Search group size is 50,000 recipients. If you have selected a radius which contains over 50,000 recipients the yellow ‘Create Group’ button will not work.
To resolve this simply reduce the radius size, or use the filtering options (detailed below) to select a smaller group. If you need a larger data group, please get in touch with your account manager.
Filtering Options
There are a number of other options available to help you select exactly the group of recipients you wish to reach, before you click the yellow ‘create group’ button.
Clicking the blue ‘Add Filters’ button brings up a menu with several filtering options.
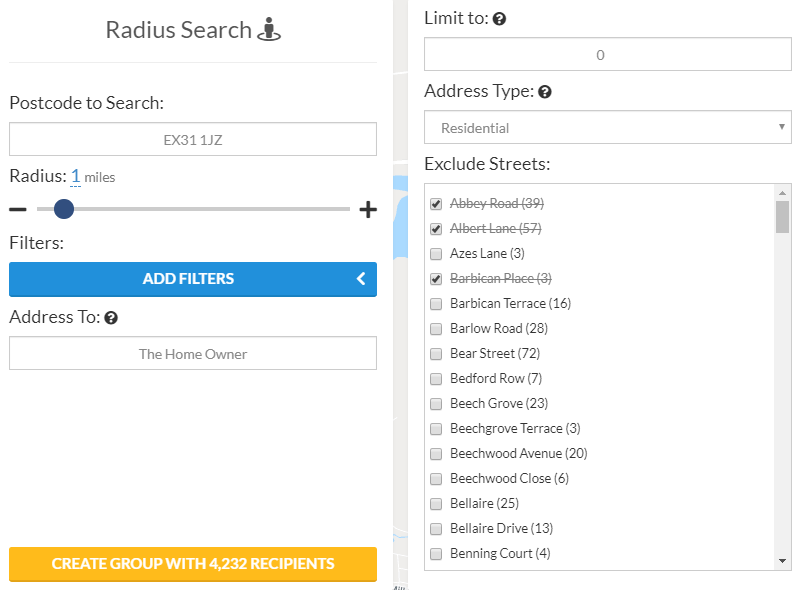
1) Exclude Streets
The Exclude Streets option shows you a list of all of the street names within the radius you have chosen.
To exclude a street, simply click the box next to the street name. A tick will appear in the box, the name will be crossed out, and the number of recipients in your group (shown on the yellow button) will decrease;
Please note; this option is only available for radii containing less than 10,000 recipients. If you need to select specific streets within a larger data group, please get in touch with your account manager.
2) Address Type
The address type option allows you to select just business addresses, just residential addresses, or all addresses (business and residential) in your chosen radius.
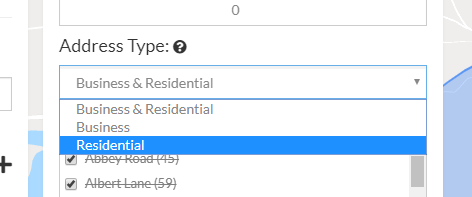
Again, as you select an address type, the yellow button will update to show how many recipients are in the group you are creating.
3) Limit the Number of Recipients
The ‘Limit to’ field allows you to limit your recipient group size to a predetermined number of recipients.
To do this, the system starts with your selected postcode and works outwards towards your selected radius, adding addresses until it reaches your chosen group size.
In effect, selecting a number of recipients reduces the radius of your search to a size that contains that number of recipients.
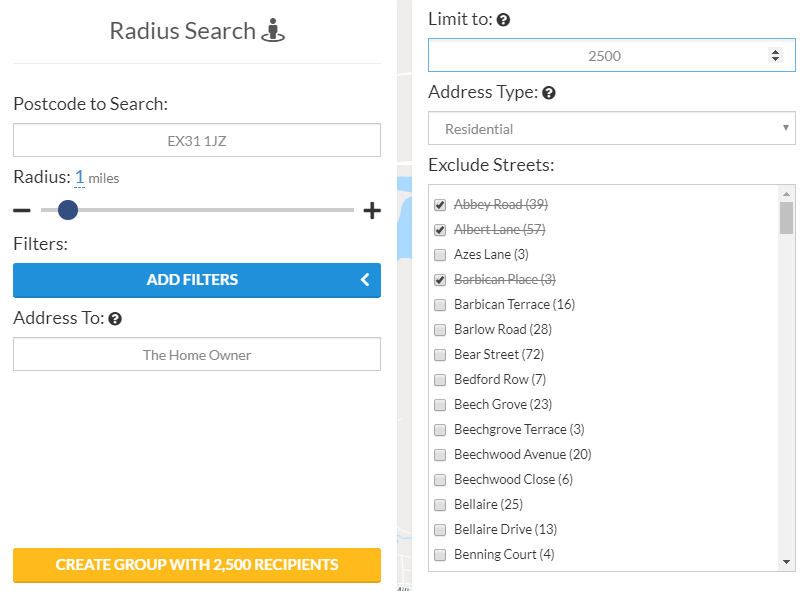
Again, as you add a recipient limit the yellow button will update to show your selected recipient group will size.
Using PRS Recipient Groups
When you are happy with your selection and click the yellow ‘create group’ button, our system will create the group and add it to your Recipient Groups list.
If you were in the process of creating a campaign and used PRS from the ‘Select Data’ screen, our system will take you back into the ‘Select Data’ page of the campaign wizard, with your new PRS group selected.
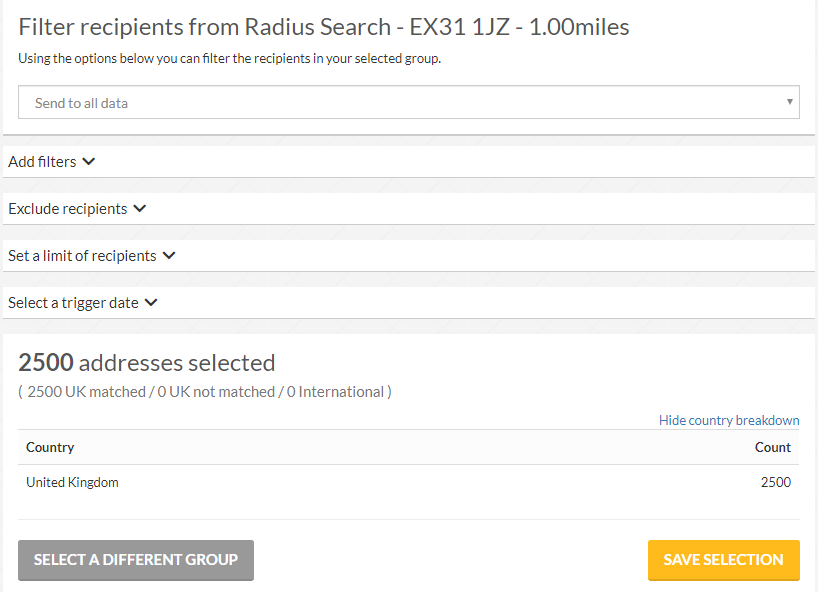
Simply click the yellow ‘Save Selection’ button to carry on with creating your campaign.
(Note; the addresses that PRS provides are derived from the PAF file, and therefore will all be verified addresses. If you select ‘send to unverified’ there will be no addresses in your selection.)
If you ran your radius search from the Dashboard or Recipient Groups screen, our system will take you to the Recipient Groups page. Your new PRS recipient group will be the most recently created group (at the top of your list).
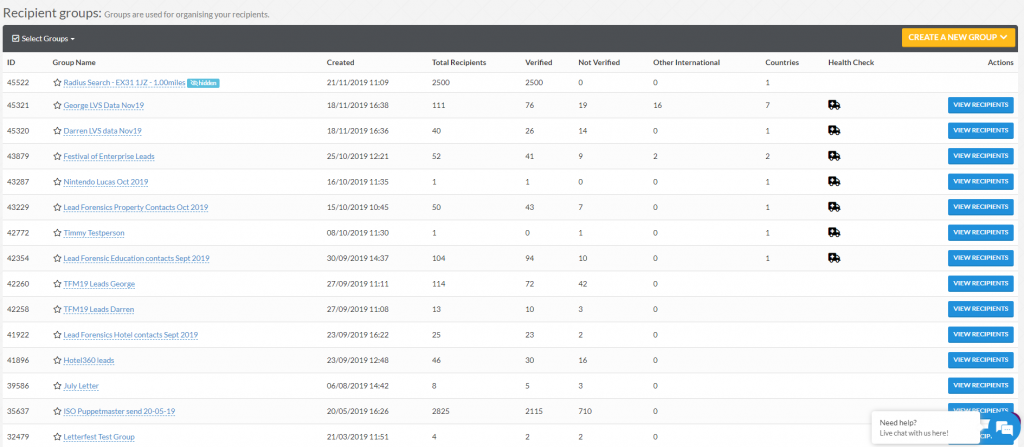

You can tell PRS groups apart from other data sets because they have the hidden icon shown above. This is because they are data sets we have generated for you, rather than data sets you own.
You are free to use the PRS data sets as the recipients for any campaigns, but will be unable to view the recipients in the group.
We hope you enjoy using our new Postcode Radius Search feature in your Direct Mail Campaigns. If you have any feedback on using it we would love to hear from you.
For more helpful hints, tips, guides and info find us on Twitter, Facebook and LinkedIn, or feel free to speak to your account manager if you have any questions or need any help.


