
There are a few useful features of the Stannp platform that you may not have noticed that are designed to make the system even more flexible and adaptable to your needs.
Blacklist
Our Blacklist feature is accessed on the ‘View Recipients’ page in the ‘Mailing List’ Menu. Clicking the ‘Select Recipients’ button enables a column of tick boxes to the left of your recipient data, as well as revealing the buttons shown below;
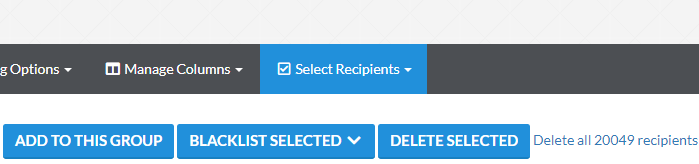
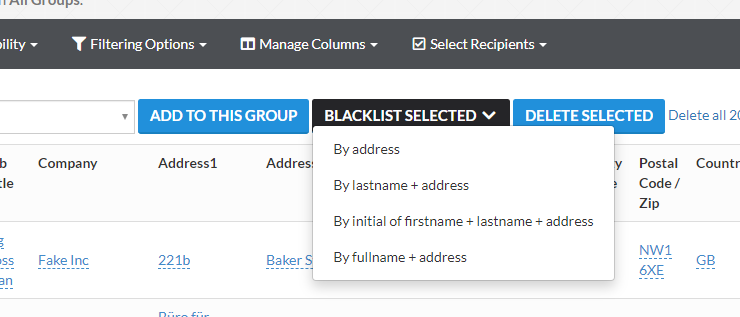
Click the tick boxes next to the recipient(s) you want to blacklist, and then click the ‘Blacklist Selected’ drop down button. Selecting this button will drop down a list of options for how to match the blacklisted recipient(s) in future, as shown below;
Any recipient data you upload in future will be compared to the blacklist and matched by the selection method you’ve chosen. If any records in the newly imported data match the blacklist they will not be included.
The options currently available (as at November 2019) are;
- By address; The system will match by address only. Any new records for the same address will not be uploaded (regardless of recipient name). Using this type of match, if the current recipient moves house and a new person moves in, you will not be able to add them to your recipients list.
- By lastname + address; The system will match by last name and address. Using this type of match, if the current recipient moves house and a new person (with a different surname) moves in you will be able to add them to your recipient database. If you wanted to mail to someone else with the same surname at that address (for example a spouse or sibling) you will not be able to add them to your recipients list.
- By initial of firstname + lastname + address; The system matches by first name initial, and last name, and address. For example, using this type of match if you blacklisted Nigel Smith at 221b Baker Street, you would not be able to add Neil Smith or Natalie Smith at the same address, but you would be able to add Zadie Smith, John Smith or Adam Smith.
- By fullname + address; This is the most detailed level of match, the system uses the full recipient name and address details for the match. Using this type of match you would be able to add Neil Smith in the example above. If you Blacklisted Robert Lott at 12 Taw Trade Park, and subsequently added Rob Lott at 12 Taw Trade Park, the system would see these as different records and allow you to add this (potentially duplicate) recipient.
When you select your match type the system records your selection and removes the select records from your recipient data; they are no longer visible or selectable in your recipients.
Recipient Filters
Recipient Filters allow you to filter your recipients on the ‘View Recipients’ page by their deliverability status (also indicated by the symbols in the ‘Deliverability’ column on the right hand side of the screen).
The options currently available (as at November 2019) are;
- All Recipients; No filter is applied to your data. You are seeing all records (use this option to remove a filter you have previously applied).
- Verified and Not Verified Recipients; This filter doesn’t display any recipients that are undeliverable. If you have recipients in your data that have not been through the matching process they also won’t be displayed.
- Verified Recipients; This filter only displays recipients that are verified as deliverable. Currently our verification process covers UK and US addresses only; addresses from other countries will not be displayed with this filter selected, nor will unverified addresses in the UK & US.
- Not Verified Recipients; This filter only displays UK and /or US recipients that are not verified as deliverable. Currently our verification process covers UK and US addresses only; addresses from other countries will not be displayed with this filter selected, nor will verified addresses in the UK & US.
- Other International Recipients; This filter displays addresses from address in countries other than the UK & US. No UK or US address will be displayed with this filter.
Don’t forget, to clear any previously applied filters you need to select ‘All Recipients‘.
Annual Repeat Triggers
You can now set an annual repeat for your campaigns, triggered either from any date field in your recipient data or from the date the recipient was added to the Stannp platform.
This is fantastic for campaigns based around your customers birthdays, anniversary “thank you” cards or offers, seasonal offers or other date-based events.
The option to setup your annual repeat is on the ‘Select Data’ page when you are building your campaign with our wizard.
When you select your recipient data group (or upload a new one), the wizard takes you to the filter recipients screen. Choose the ‘Select a trigger date’ option as highlighted here;
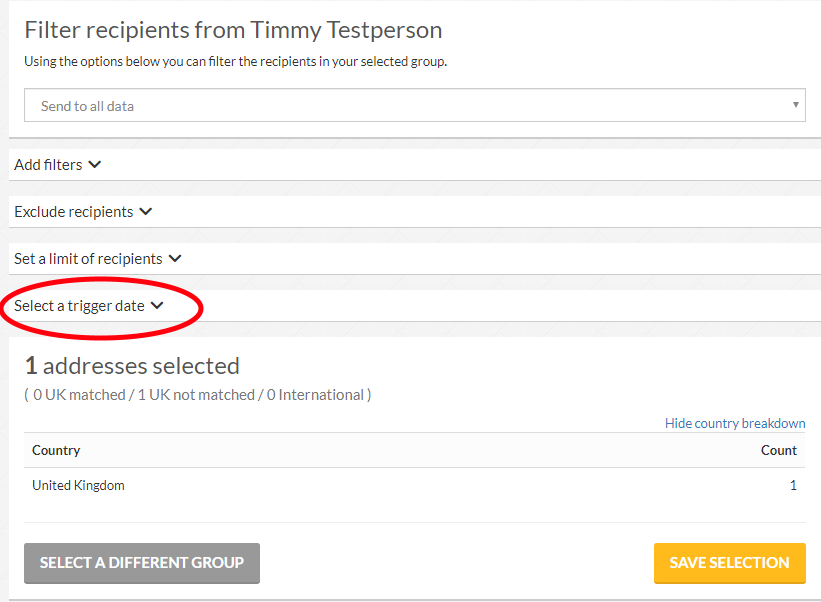
Selecting this brings up the trigger date options;

Select the date field you want to use (or “when recipient joins the group”) in the “Choose a date field” drop-down menu, and select ‘repeat annually’ in the “Repeat” drop-down menu.
You can also choose to set a date offset if you wish in the “Date offset” field. This means that the Stannp platform will send your campaign your chosen number of days before or after the trigger date, rather than on the trigger date.
For example, you might want to send birthday cards a few days before the recipient’s birth date, rather than on the actual day, in order to ensure the card arrives on or before their birthday.
When you are happy that the campaign is set to your requirements, click the yellow “Next” button to move on to the review & approval section of your campaign.
We hope you find our Blacklists, Recipient Filters, & Annual Triggers features useful and helpful in managing your campaigns. For more hints, tips, guides and info you can find us on Twitter, Facebook and LinkedIn, or feel free to speak to your account manager if you have any questions or need any help.


