The team at Stannp.com like to measure how we are doing across a suite of different indicators, to make sure we are providing our customers with the best possible service.
We’ve noticed a recent increase in campaigns where customers have used artwork that isn’t ‘Edge to Edge’, so we’ve decided to update our guidance to help you get the most out of your campaigns and make it as easy as possible to get campaigns right first time.
What Does ‘Edge to Edge’ Mean?
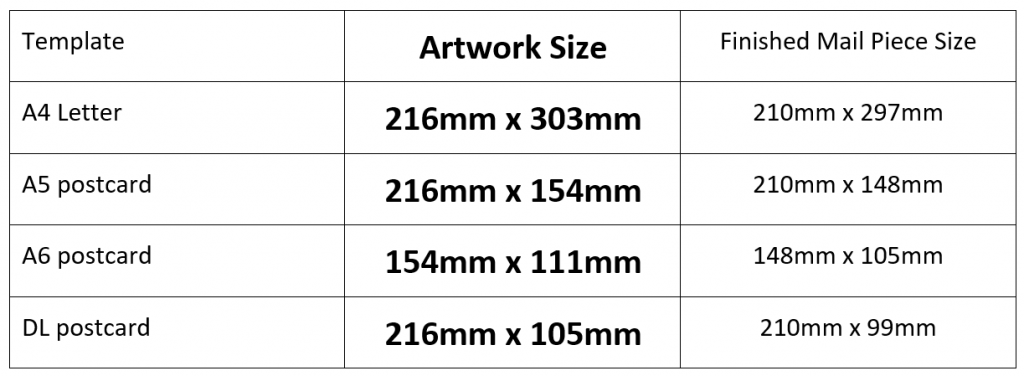
‘Edge to Edge’ simply means that the background design for your mail piece is large enough to completely fill the dimensions of the template. The best (and easiest) way to achieved this is by uploading artwork that is already at the correct size for the template, which will be 3mm larger on every size than the finished size of your mailing.
These are the artwork upload sizes;
Why Does My Background Need to Be Bigger?
We appreciate that at first glance this might be counterintuitive! In order to explain we need to talk a little about the process of print production, and some technical terms; ‘Trim’, ‘Bleed’, and ‘Safe Zone’.
Professional print is always produced on oversized stock and cut down to the finished size after printing, in order to allow the print to reach right to the edge of the document. This is how we produce your mail pieces at Stannp, they are printed on oversized paper or card, usually several at a time on an SRA3 size sheet, and then guillotined to exactly the right size.
This is what a mailing looks like straight from the printer before it has been cut;
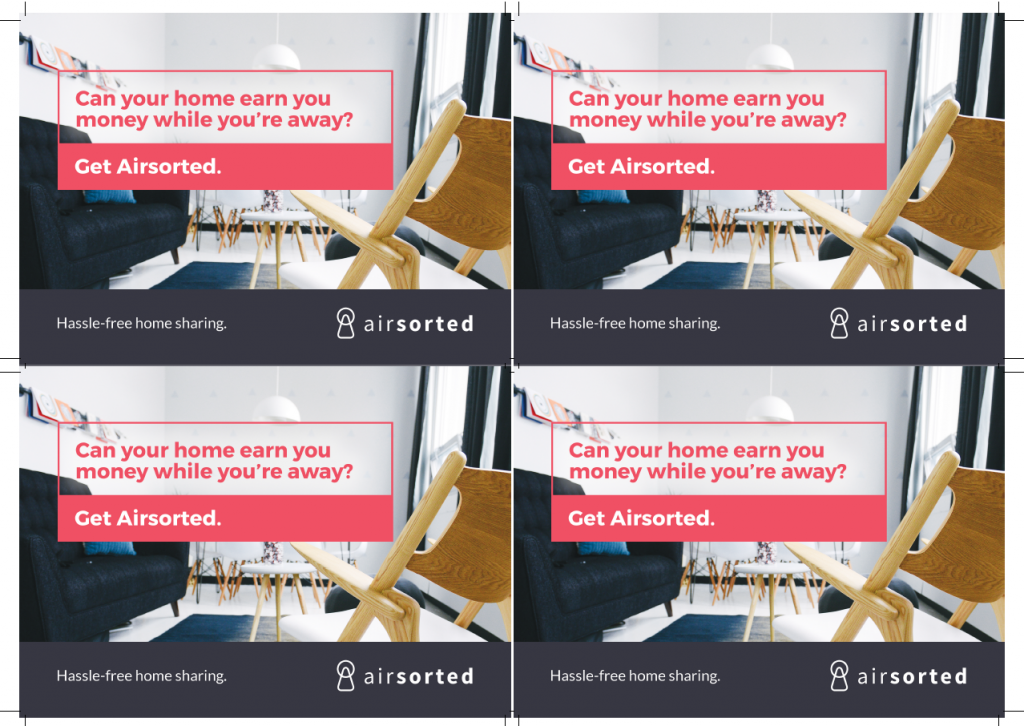
You can see in this image the trim marks (little black lines at the edges of the postcards). These are guidelines for guillotine operator to aim the cutting blade, showing the area of the design that needs to be removed to make it the correct finished mail piece size. You will also see these marks on your design on the Stannp platform.
The portion of the design that is outside these trim lines (and will therefore be removed) is known as the bleed and is indicated on the stannp platform by the bleed margin, which is the pink zone around the edge. If your artwork is the correct size it will show underneath the bleed margin, like this;
Correct 
Wrong Size
In the printed example above you can see that all of the important information is well away from the edges of the design, in the safe zone. Anything important needs to be inside the safe zone, this will ensure it is not cut into during the guillotining process.
For the best results you need to ensure the Background colour or image fills the bleed margins by uploading artwork at the artwork size given in the table above, but that all the important content (logos, product images, text etc) is inside the safe zone so it won’t be cut off when the mail is cut to size.
Is There An Easy Way To Make Artwork The Right Size?
There are numerous design programmes available, from professional packages like Photoshop and InDesign to free packages and online design tools. Any of these packages will allow you to specify the design size before you start creating, make sure start by specify the artwork size as shown in the table above before you begin designing.
If you are using a professional designer, make sure you specify that you need a 3mm bleed on your artwork so they can get it right first time.
I Don’t Have Design Software, What Can I Use?
Canva
Here at Stannp we also send our own Direct Mail campaigns, and we like to use Canva (https://www.canva.com/) for creating our designs. It’s an online platform that allows you to create any size design quickly and easily, and best of all it’s free! (there are also upgradeable paid versions).
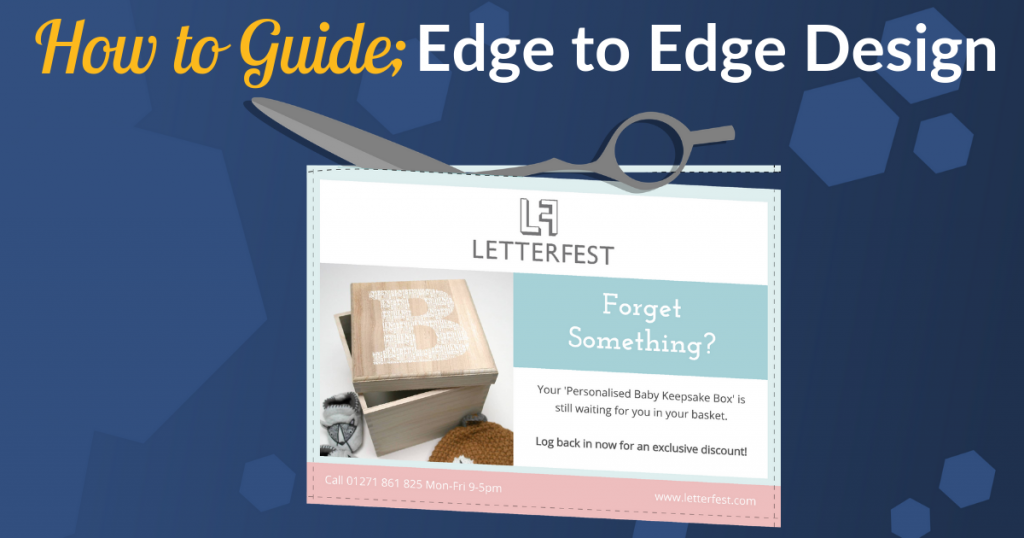
We find it really easy to use, in fact we also use it for creating a lot of our social media graphics (including the graphic at the top of this blog post).
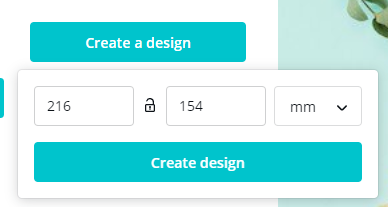
To make sure your artwork is the right size just click ‘create a design’, then ‘custom dimensions’, and enter the size you need (we are making artwork for an A5 postcard in the example);
Click ‘create design’ and a new browser tab will open with a blank design of the right size ready to go. We think the Canva interface is pretty easy to navigate, but if you need any help they also have comprehensive help, tutorials and walkthroughs on their website here https://support.canva.com/.
When you have finished your design click ‘publish’ then ‘download’, and we suggest you choose “PDF Print” as this will give you the perfect file to upload as a background straight onto the Stannp platform.
Microsoft Word
We know some of our clients like to design in Microsoft Word, especially when producing A4 letters. Whilst Word is not the most flexible of design tools, it is still perfectly possible to create a good-looking design that works with the Stannp platform with these simple tips.
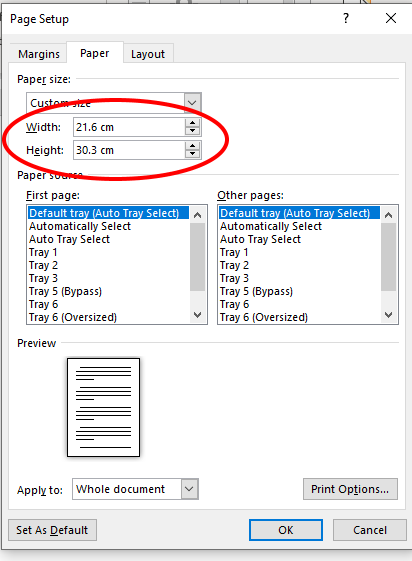
Before you do any work on the design, make sure the document is the right size (Word will have defaulted to either A4 or Letter size). To do this, click ‘Layout’ on the top menu bar, then ‘Size’ from the menu ribbon, and ‘More Paper Sizes’ at the bottom of the list;

Enter the correct sizes in the ‘Width’ and ‘Height’ boxes (remembering that the sizes in the table above are in mm, and word is in cm, so you need to divide by 10 to convert them);
Click OK and word will resize the document.
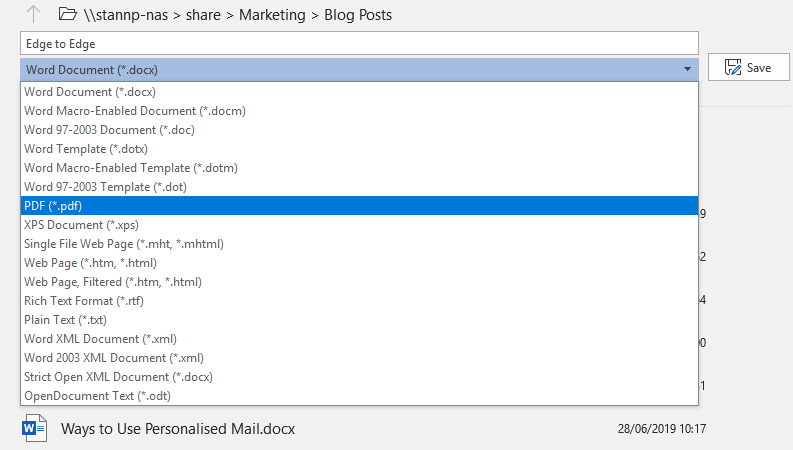
When you have finished making your design and have saved it as a Word document, you will need to save it as a PDF to be able to upload it to the Stannp platform.
To do this select ‘File’, then ‘Save As’, and use the dropdown box to change the file type from (*.docx) to (*.pdf), then click the Save button;
You now have a PDF version of your document, ready to upload as a background image for your Stannp campaign.
Microsoft PowerPoint
Another option for creating your design without specialist software is Microsoft PowerPoint.
Again, before you do any work on the design, make sure the document is the right size (PowerPoint will have defaulted to either standard 4:3 or widescreen 16:9).
To do this, click ‘Design’ on the top menu bar, then ‘Slide Size’ from the menu ribbon, and ‘Custom Slide Sizes’ at the bottom of the list;
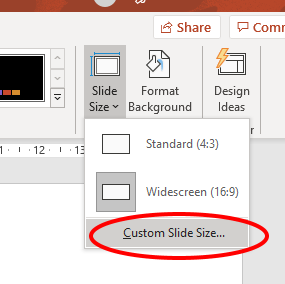
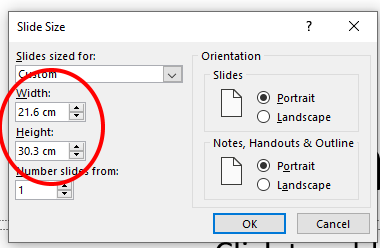
Enter the correct sizes in the ‘Width’ and ‘Height’ boxes (again remembering that the sizes in the table above are in mm, and word is in cm, so you need to divide by 10 to convert them);
When you have finished making your design and have saved it as a PowerPoint presentation, you will need to save it as a PDF to be able to upload it to the Stannp platform.
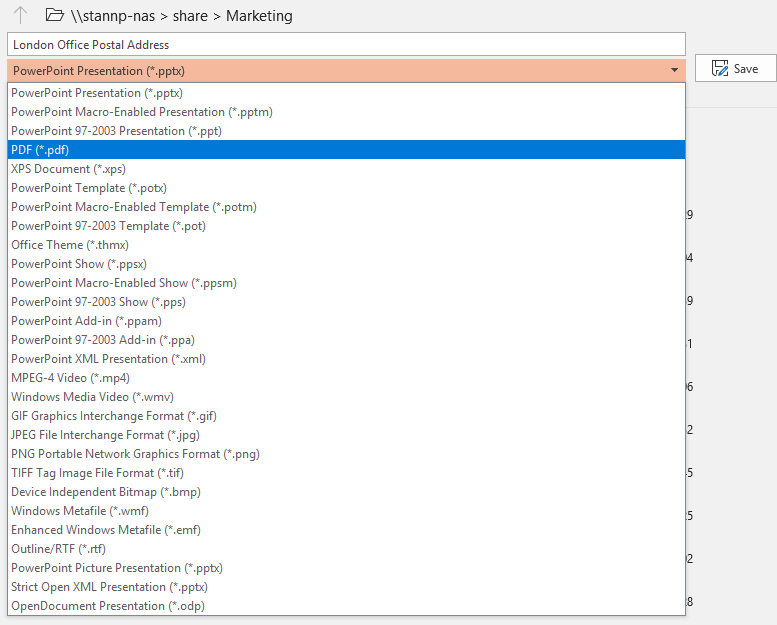
To do this select ‘File’, then ‘Save As’, and use the dropdown box to change the file type from (*.pptx) to (*.pdf), then click the Save button;
You now have a PDF version of your document, ready to upload as a background image for your Stannp campaign.
Do Stannp Have Any Other Resources to Help Me?
We do! You can download templates from our website. Just select the size you need from the drop down menu and the click the yellow ‘Download Selected Template’ button.
You can also download a guide that explains how to use the templates.
We also have some videos on our YouTube channel to show you how to upload your designs to our platform;
Postcards: https://www.youtube.com/watch?v=QWsOh7qVqK8
Letters: https://www.youtube.com/watch?v=xVhkWqpPOKM
We hope you’ve found this guide useful. Don’t forget, for more useful hints tips and info find us on Twitter, Facebook and LinkedIn, and speak to your account manager.


